# e-Document
# การใช้งานระบบ e-Document สำหรับผู้ใช้งาน
สามารถดาวน์โหลด คู่มือการใช้งานสำหรับผู้ใช้งาน ได้ที่ลิงค์ด้านล่างนี้
[คู่มือการใช้งานสำหรับผู้ใช้งาน](https://edoc.nstru.ac.th/DocClient/download/MAN_UW-NSRU66-EDOC-01-EDOC.pdf)
# การใช้งานระบบ e-Document สำหรับผู้บริหาร
สามารถดาวน์โหลด คู่มือการใช้งานระบบสำหรับผู้บริหาร ได้ที่ลิงค์ด้านล่างนี้
[คู่มือการใช้งานระบบสำหรับผู้บริหาร](https://edoc.nstru.ac.th/DocClient/download/MAN_UW-NSRU66-EDOC-02-EDOC_EX.pdf)
# การเข้าใช้งานระบบ e-Document
คลิกเปิดใช้งานโปรแกรมโดยใช้ Microsoft Edge ดังรูป
[](https://arit-manual.nstru.ac.th/uploads/images/gallery/2023-10/3LOimage.png)
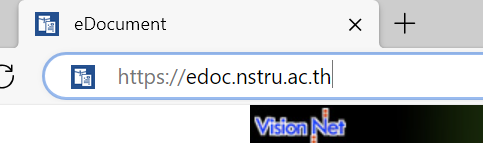
เพิ่มเข้าไปที่ [https://edoc.nstru.ac.th/](https://edoc.nstru.ac.th/)
[](https://arit-manual.nstru.ac.th/uploads/images/gallery/2023-10/3Elimage.png)
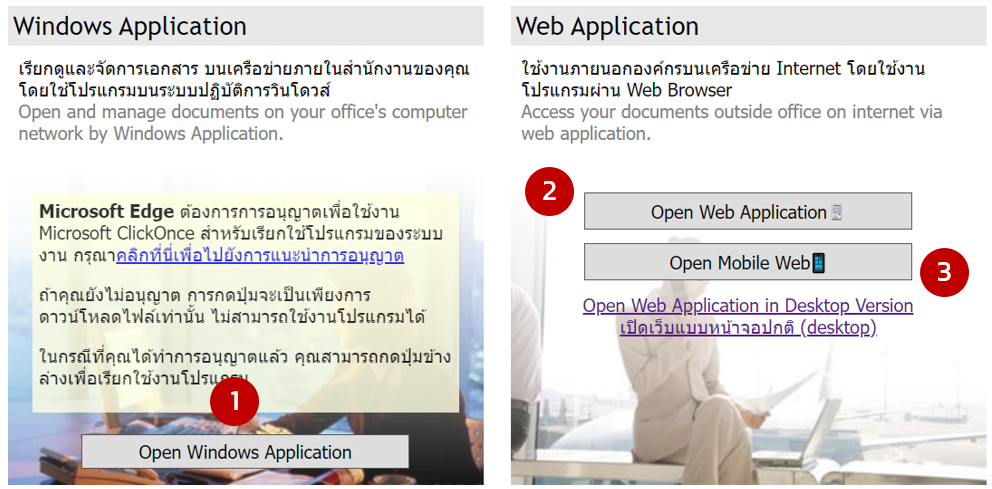
หน้าระบบเมื่อเข้าผ่าน URL จะปรากฏหน้าจอดังรูป
[](https://arit-manual.nstru.ac.th/uploads/images/gallery/2023-10/ufqimage.png)
การเข้าใช้งาน e-Document สามารถเข้าใช้งานได้ 3 รูปแบบ คือ
1. **Windows Application** เป็นการใช้งานโดยการโหลดและติดตั้งโปรแกรม e-Document ไว้ในเครื่องคอมพิวเตอร์ของผู้ใช้งาน ซึ่งจะสามารถใช้งานได้บนเครื่องคอมพิวเตอร์ที่ติดตั้งระบบปฏิบัติการ Windows เท่านั้น
2. **Web Application** เป็นการเรียกใช้งาน e-Document ผ่านเว็บบราวเซอร์ โดยไม่ต้องติดตั้งโปรแกรมลงในเครื่อง และสามารถรองรับเว็บบราวเซอร์หลายค่าย เช่น Microsoft Edge, Chrome และ Firefox ซึ่งง่ายต่อการใช้งาน และมีเครื่องมือให้ใช้งานใกล้เคียงกับรูปแบบ Windows Application ซึ่งเหมาะแก่การใช้งานของผู้ใช้งานทั่วไปที่ต้องการเข้าใช้งานระบบด้วยคอมพิวเตอร์ หรือโน้ตบุ้ค เพื่อเปิดอ่านหนังสือ ลงรับ เกษียณ และเซ็นหนังสือ โดยรูปแบบ Web Application นี้อาจสามารถเรียกดูข้อมูล และทำงานได้ช้ากว่ารูปแบบ Windows Application อยู่บ้าง
3. **Mobile Web** เป็นการเรียกใช้งานที่เหมาะกับอุปกรณ์พกพาเช่น มือถือ และ Tablet ซึ่งช่วยให้ง่ายแก่การเปิดอ่าน และลงนามหนังสือ โดยการใช้งานทั่วไปใกล้เคียงกับการใช้งานในรูปแบบ Web Application เนื่องจากสามารถเรียกใช้งานผ่านเว็บบราวเซอร์เช่นเดียวกัน
### การเข้าใช้งานรูปแบบ Window Application
คลิกที่ปุ่ม
[](https://arit-manual.nstru.ac.th/uploads/images/gallery/2023-10/SQYimage.png)
ผ่านบราวเซอร์ Microsoft Edge กรณีที่ใช้บราวเซอร์อื่น เช่น chrome จำเป็นต้องติดตั้ง Extension เพิ่มเติม จึงกดใช้งานรูปแบบนี้ได้ โดยเมื่อกดปุ่ม Open Window Application จะปรากฏบ็อปอัพดังรูป
[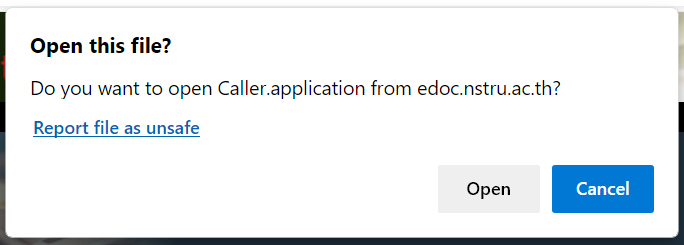](https://arit-manual.nstru.ac.th/uploads/images/gallery/2023-10/a3eimage.png)
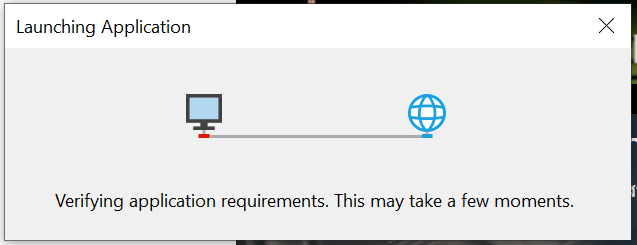
ให้ทำการกดปุ่ม Open จะปรากฎหน้าต่างโหลดโปรแกรม โดยให้รอจนกว่าโปรแกรมจะโหลดข้อมูล และติดตั้งเสร็จสิ้น
[](https://arit-manual.nstru.ac.th/uploads/images/gallery/2023-10/XG4image.png)
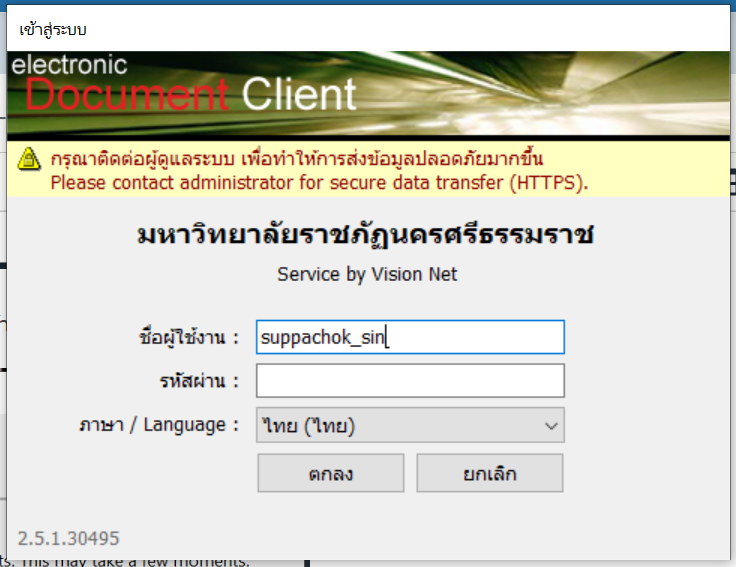
โดยเมื่อโปรแกรมได้ทำการติดตั้งในเครื่องเสร็จสิ้นแล้วจะปรากฏหน้าต่างสำหรับยืนยันตัวตน ดังรูปด้านล่าง จากนั้นให้ใส่ชื่อผู้ใช้งานและรหัสผ่าน โดยสามารถใช้งานชื่อผู้ใช้งานและรหัสผ่านเข้าใช้งานอินเทอร์เน็ตในการเข้าใช้งานโปรแกรมได้เลย กรณีที่ใครยังไม่มีบัญชีผู้ใช้เข้าใช้งานอินเทอร์เน็ตสามารถติดต่อขอบัญชีได้ที่สำนักวิทยบริการและเทคโนโลยีสารสนเทศ
[](https://arit-manual.nstru.ac.th/uploads/images/gallery/2023-10/QaEimage.png)
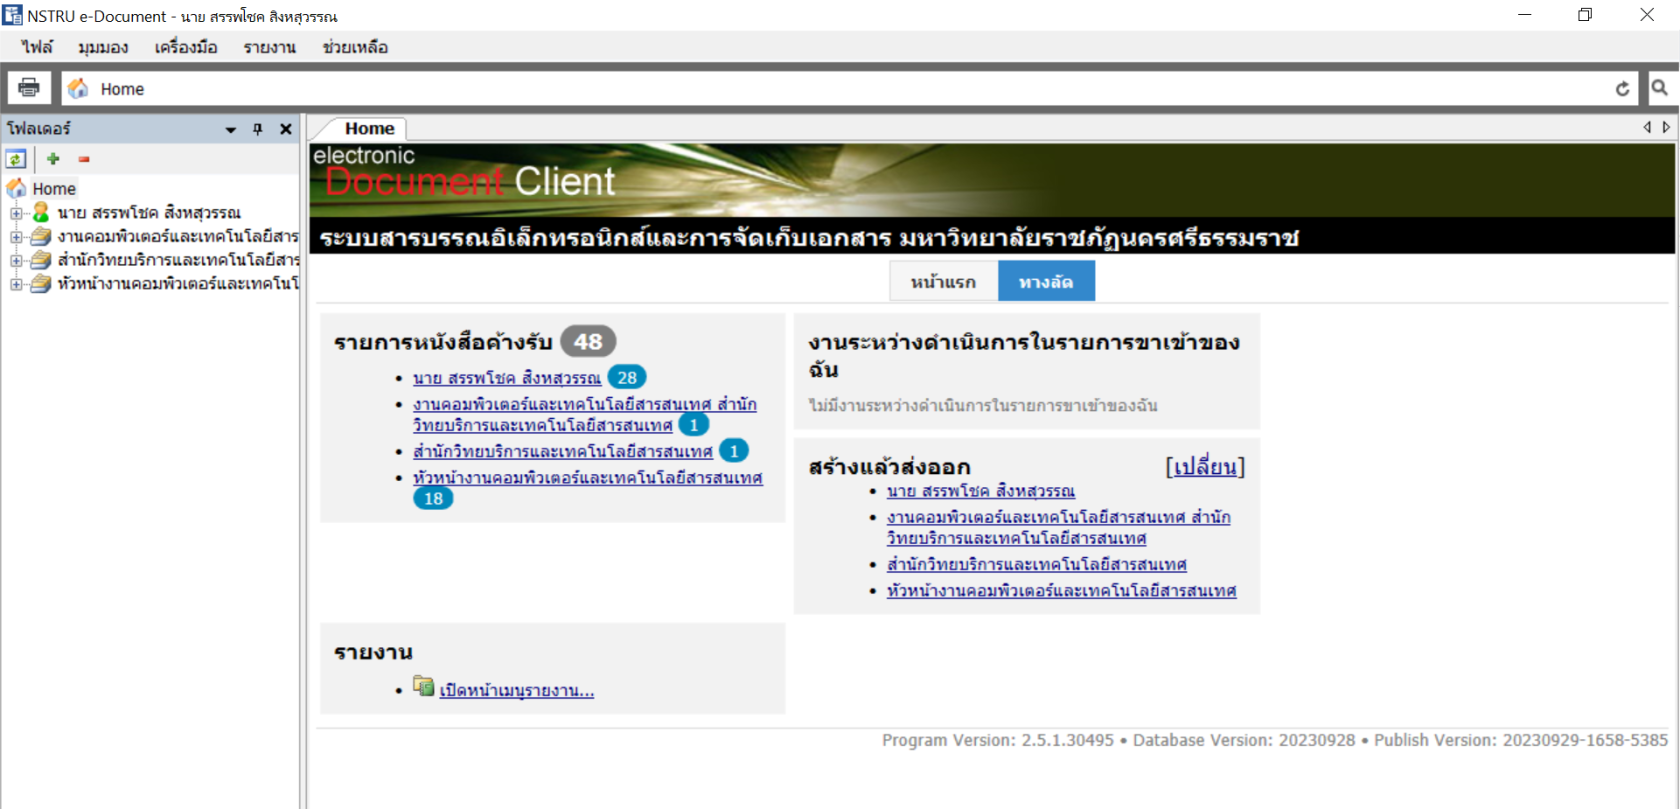
เมื่อได้ทำการยืนยันตัวตนเรียบร้อยแล้วโปรแกรม e-Document ก็จะเปิดขึ้นให้ใช้งานดังรูป
[](https://arit-manual.nstru.ac.th/uploads/images/gallery/2023-10/pnaimage.png)
### การเข้าใช้งานรูปแบบ Web Application
สามาถเข้าใช้งานรูปแบบนี้โดยคลิกปุ่ม
[](https://arit-manual.nstru.ac.th/uploads/images/gallery/2023-10/HPFimage.png)
จากนั้นบราวเซอร์จะพาเราเข้าสู่หน้าการยืนยันตัวตนเข้าสู่ระบบ ให้ทำการใส่ชื่อผู้ใช้ และรหัสผ่าน (สามารถใช้งานชือผู้ใช้และรหัสผ่านเข้าใช้งานอินเทอร์เน็ตได้เลย) จากนั้นกดปุ่ม Login
[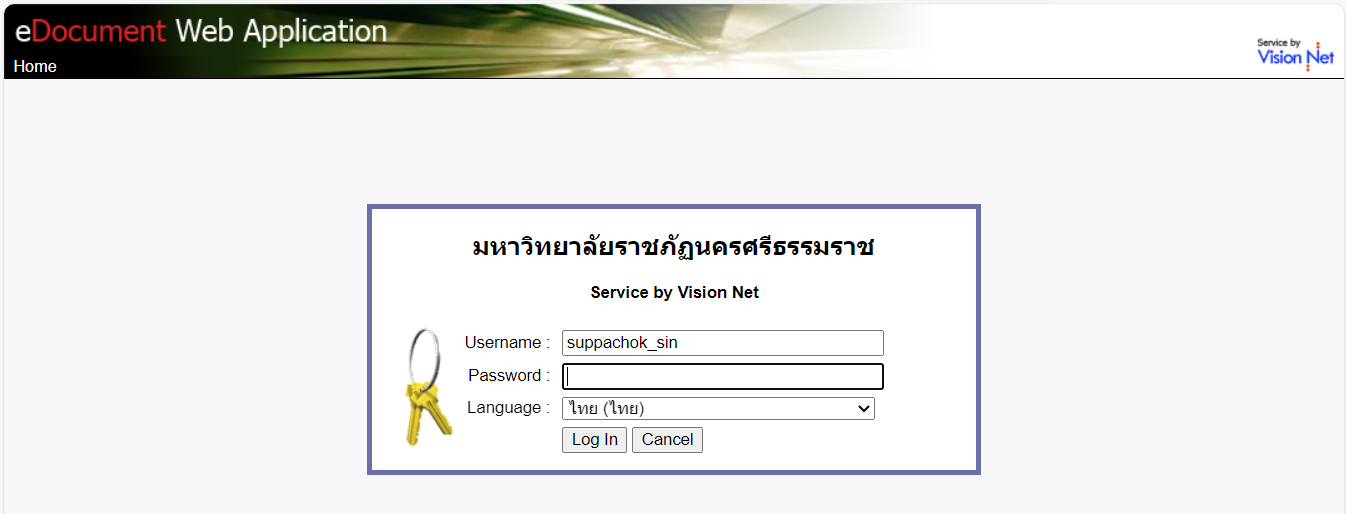](https://arit-manual.nstru.ac.th/uploads/images/gallery/2023-10/MGQimage.png)
เมื่อได้ทำการยืนยันตัวตนเรียบร้อยก็จะสามารถใช้งานระบบ e-Document ผ่านเว็บบราวเซอร์ได้เลย ดังรูปด้านล่าง
[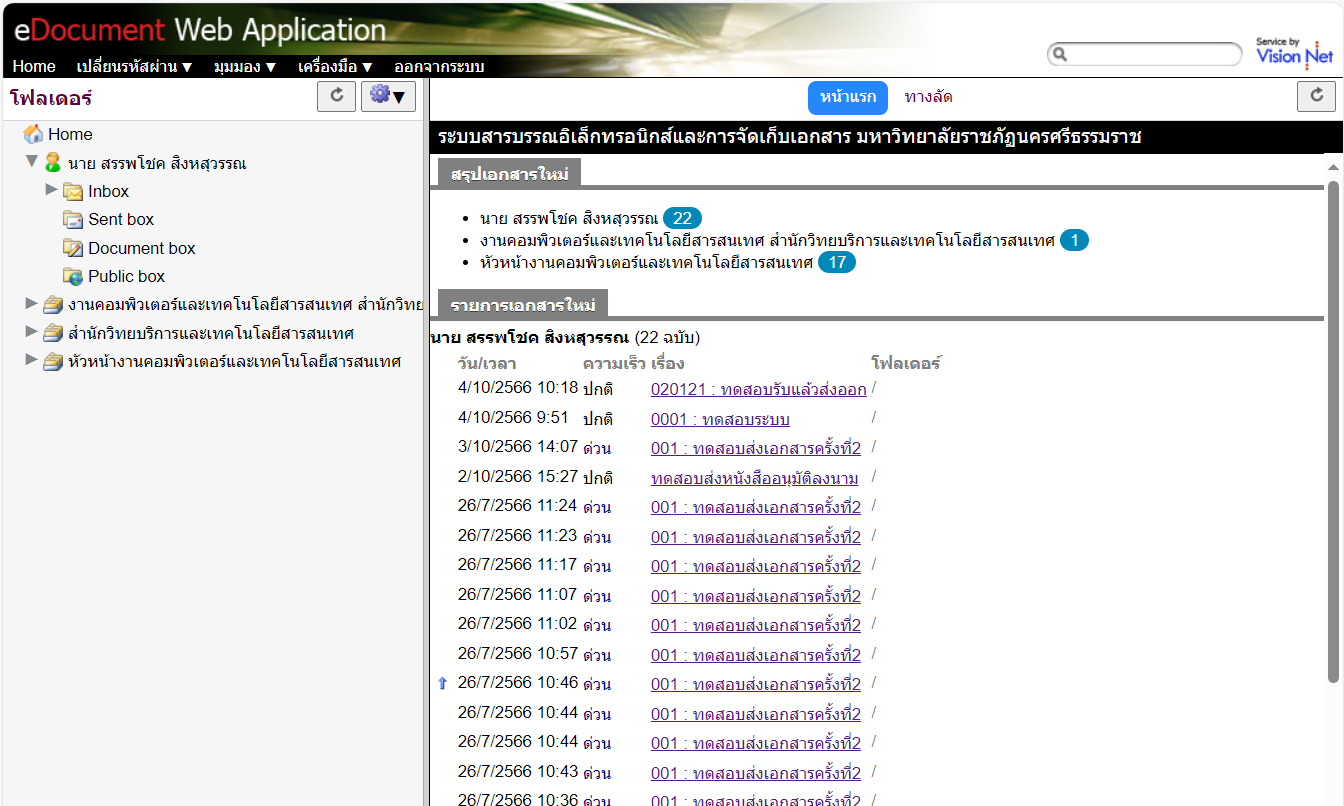](https://arit-manual.nstru.ac.th/uploads/images/gallery/2023-10/Ggiimage.png)
### การเข้าใช้งานรูปแบบ Mobile Web
สามารถเข้าใช้งนาได้โดยคลิกปุ่ม
[](https://arit-manual.nstru.ac.th/uploads/images/gallery/2023-10/j1limage.png)
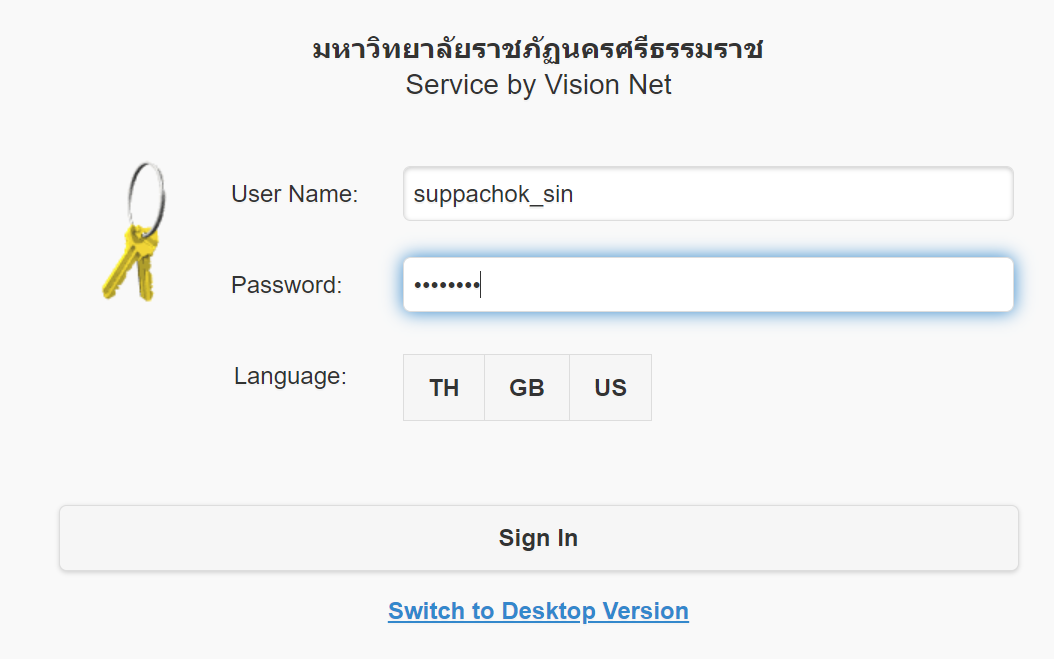
จากนั้นให้ทำการยืนยันตัวตนเข้าใช้งานโดยใส่ชื่อผู้ใช้ และรหัสผ่าน (สามารถใช้งานชือผู้ใช้และรหัสผ่านเข้าใช้งานอินเทอร์เน็ตได้เลย) จากนั้นกดปุ่ม Sign In
[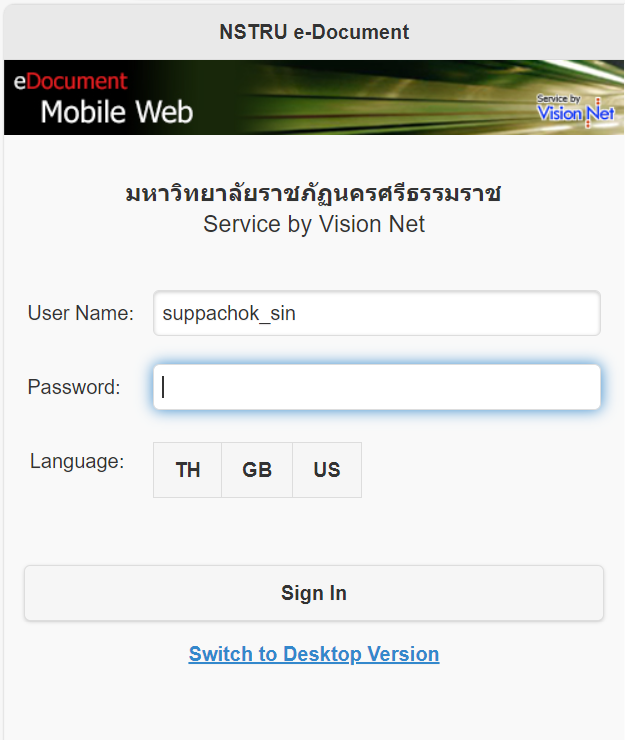](https://arit-manual.nstru.ac.th/uploads/images/gallery/2023-10/xL1image.png)
เมื่อได้ทำการยืนยันตัวตนเรียบร้อยก็จะสามารถใช้งานระบบ e-Document ผ่านเว็บบราวเซอร์ได้เลย ดังรูปด้านล่าง
[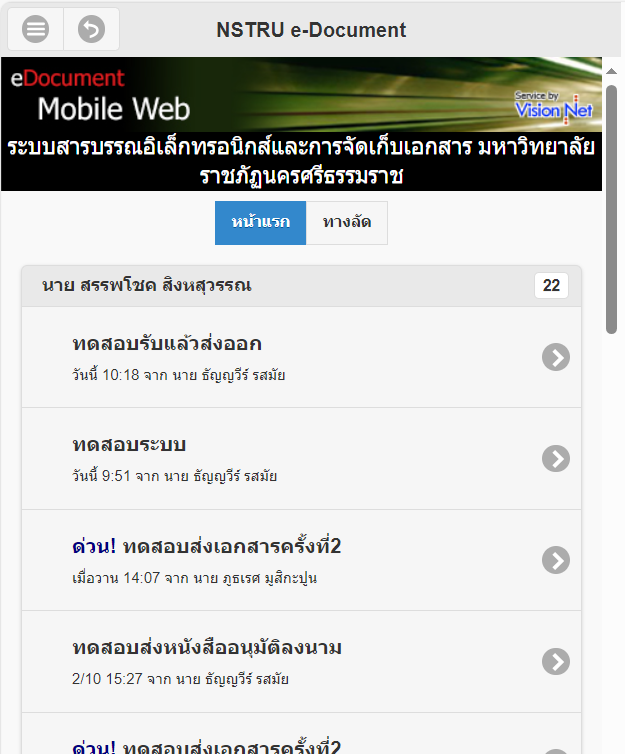](https://arit-manual.nstru.ac.th/uploads/images/gallery/2023-10/A3Dimage.png)
# การสร้างและจัดการเลขหนังสือรับ - ส่ง
### การสร้างเลขรับ-ส่ง
ไปที่เมนู > เครื่องมือ > เลขรับและส่งเอกสาร
[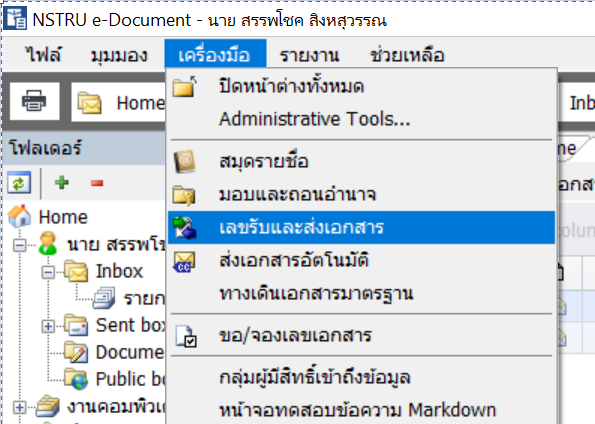](https://arit-manual.nstru.ac.th/uploads/images/gallery/2023-10/9bOimage.png)
ให้เลือกชื่อกล่องรับ-ส่งที่เราต้องการสร้างเลขหนังสือ
[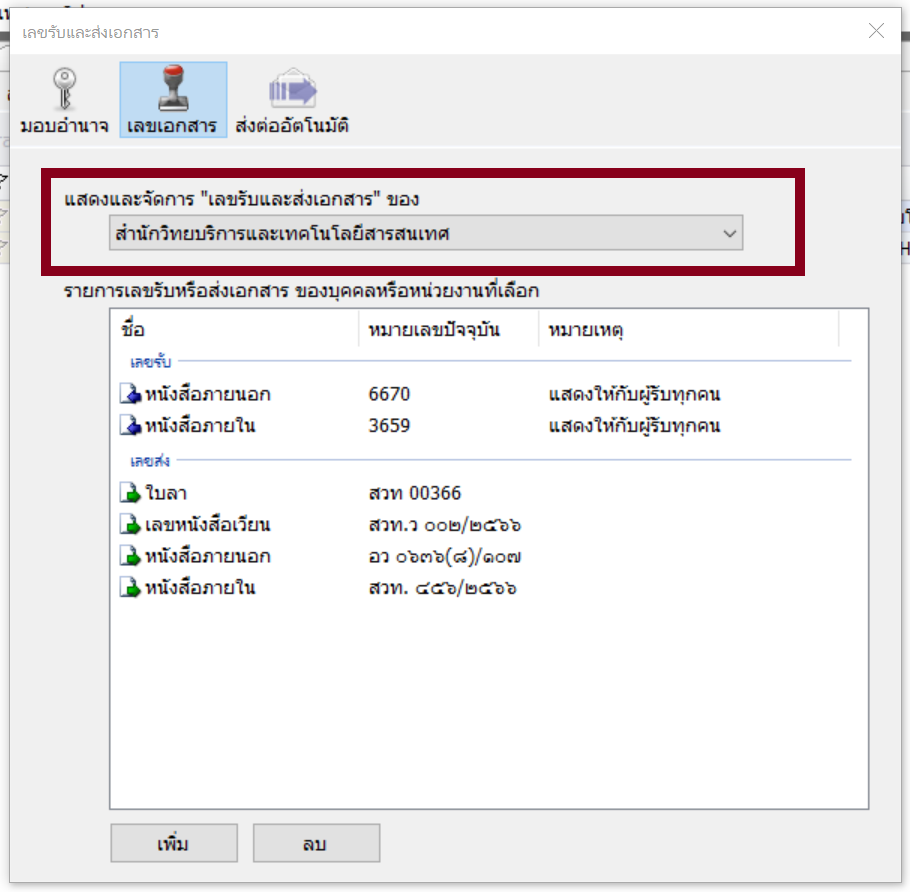](https://arit-manual.nstru.ac.th/uploads/images/gallery/2023-10/WkMimage.png)
คลิกปุ่ม **เพิ่มเลข**
[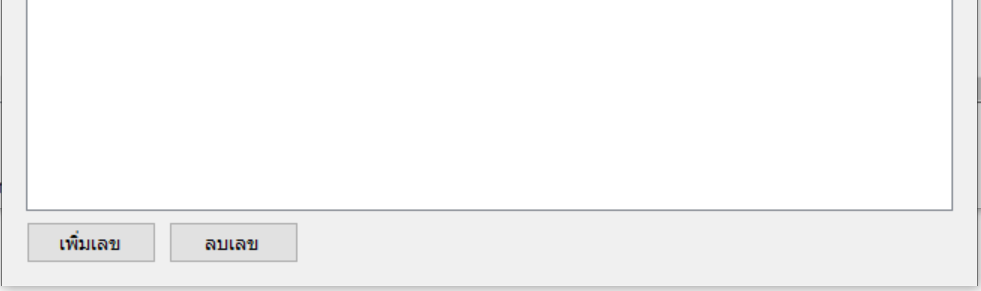](https://arit-manual.nstru.ac.th/uploads/images/gallery/2023-10/46qimage.png)
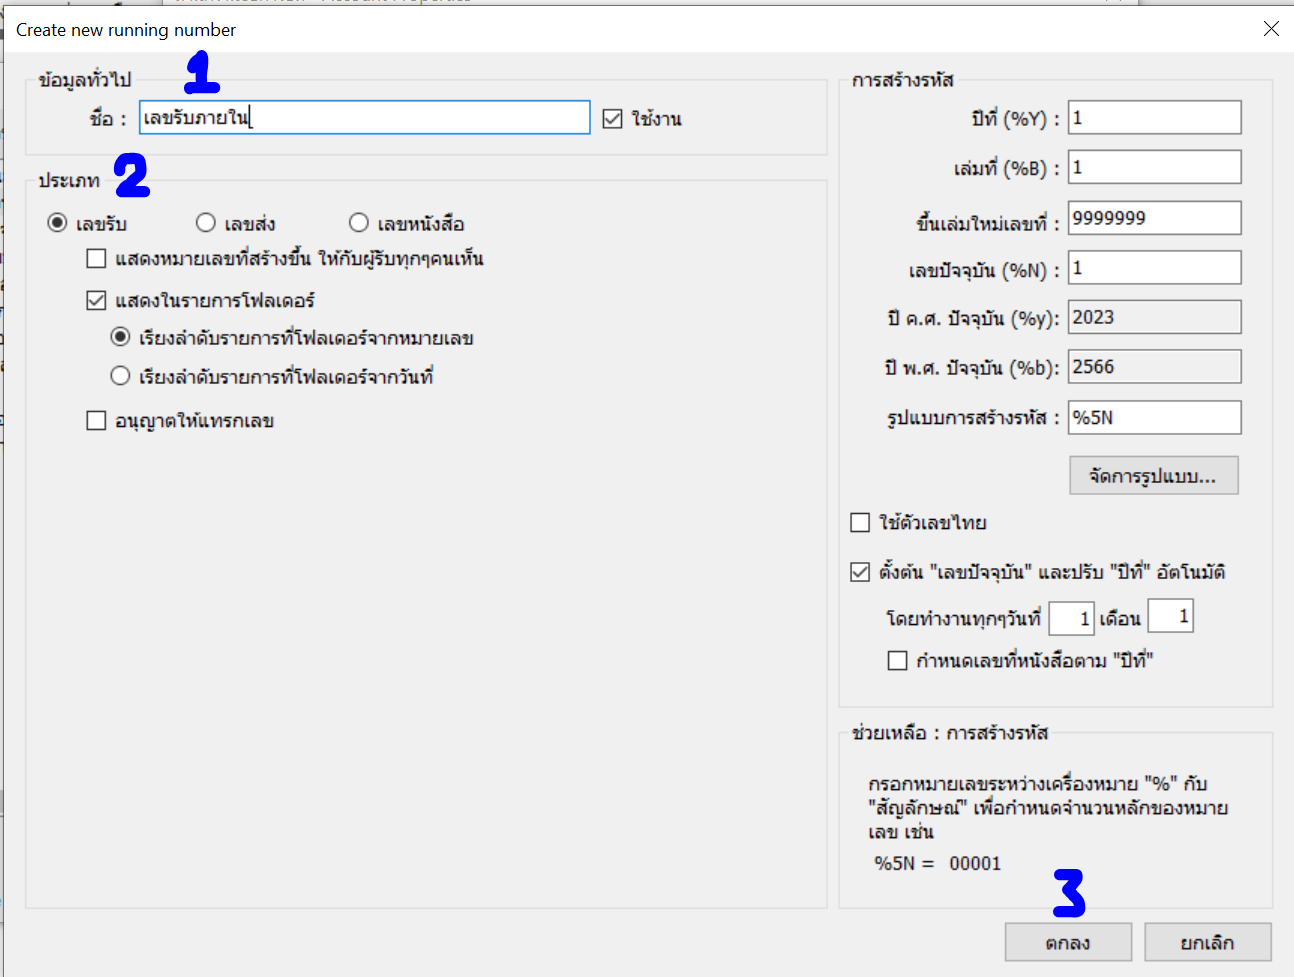
ตั้งชื่อเลขรับ เช่น **เลขรับภายใน** จากนั้นเลือกประเภท โดยหากต้องการสร้าง **เลขรับ** ให้เลือกเป็น **เลขรับ** แต่หากต้องการสร้าง **เลขส่ง** ให้เลือกประเภทเป็น **เลขส่ง**
[](https://arit-manual.nstru.ac.th/uploads/images/gallery/2023-10/GVMimage.png)
#### การกำหนดรูปแบบ
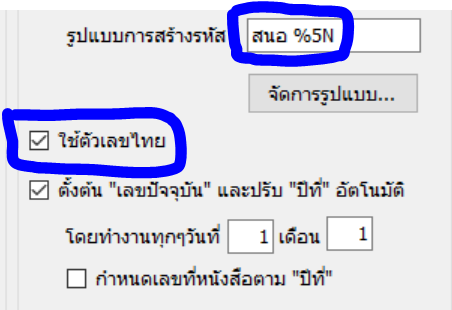
การกำหนดรูปแบบของเลขรับ-ส่ง สามารถกำหนดในช่อง **รูปแบบการสร้างรหัส** โดยการกำหนดรูปแบบเราสามารถใส่ตัวอักษรย่อ หรือข้อความไว้หน้าตัวเลขที่ออกได้ โดยตัวเลขที่ออกจะแสดงอยู่ในค่า %5N ส่วนกรณีที่ต้องการให้ตัวเลขแสดงเป็นตัวเลขไทย สร้างกำหนดได้โดยทำเครื่องหมายกาถูกที่ **ใช้ตัวเลขไทย** ดังรูปด้านล่าง
[](https://arit-manual.nstru.ac.th/uploads/images/gallery/2023-10/HAlimage.png)
ตัวอย่าง รูปแบบเอกสารที่สร้างเสร็จเรียบร้อยแล้ว
[](https://arit-manual.nstru.ac.th/uploads/images/gallery/2023-10/JLbimage.png)
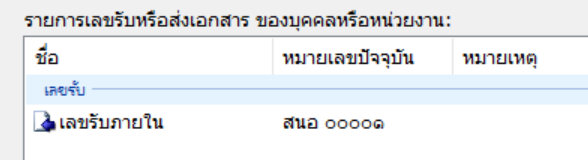
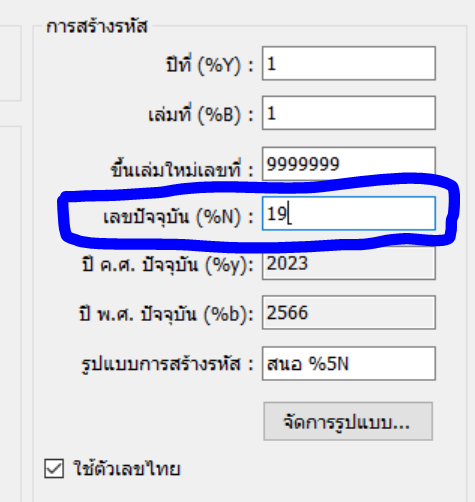
#### การกำหนดเลขเริ่มต้น
การกำหนดเลขเริ่มต้นสำหรับใช้งาน หากเราต้องการให้เลขเอกสารออกเลขเป็นปัจจุบัน ที่เริ่มใช้งานให้เปลี่ยนค่าในช่อง **เลขปัจจุบัน (%N)** ให้กำหนดค่าแทนเลข 1 เป็นค่าที่เราต้องการเริ่มต้น
[](https://arit-manual.nstru.ac.th/uploads/images/gallery/2023-10/pS2image.png)
จากนั้นกดปุ่มตกลงเพื่อทำการบันทึกค่า เมื่อระบบบันทึกค่าเรียบร้อยแล้ว ตัวเลขปัจจุบันจะเปลี่ยนไปตามที่เราได้ตั้งค่าไว้ดังรูป
[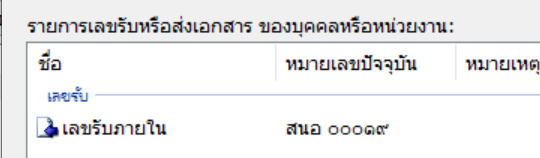](https://arit-manual.nstru.ac.th/uploads/images/gallery/2023-10/wmHimage.png)
โดยหน่วยงานสามารถกำหนดเลขรับ-ส่งภายใน และเลขรับ-ส่งภายนอก ได้ตามที่หน่วยงานต้องการใช้งานได้
[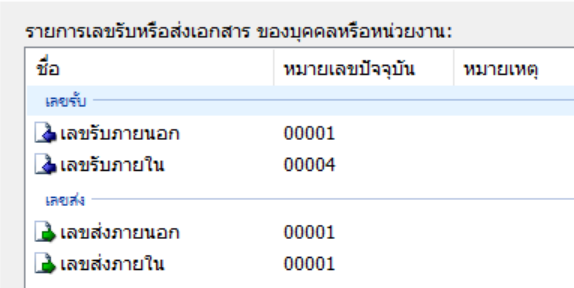](https://arit-manual.nstru.ac.th/uploads/images/gallery/2023-10/CRUimage.png)
# การสร้างกลุ่ม เพื่อส่งเอกสาร
### ประโยชน์
- สามารถจัดกลุ่มผู้ส่งแยกไว้ตาม หรือตามกลุ่มงาน
- ช่วยประหยัดเวลาในการการเลือกผู้ส่ง
### วิธีการสร้างกลุ่ม
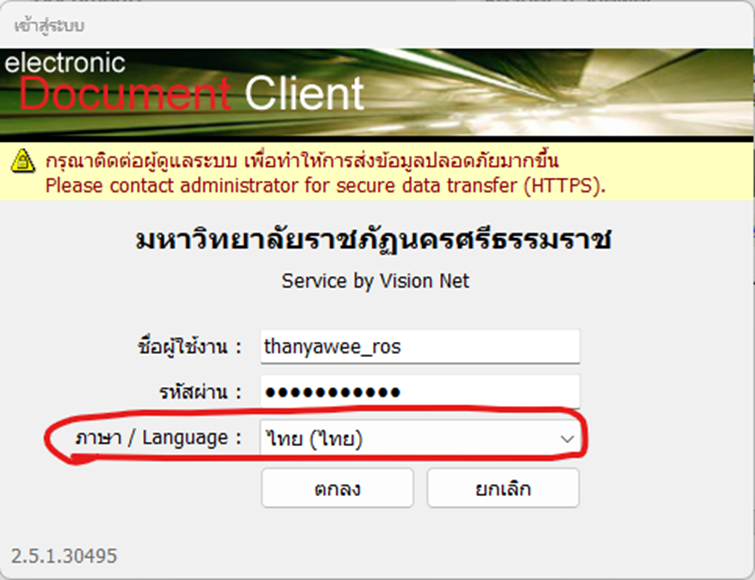
1\. เข้าสู่ระบบในโหมดของ window application
2\. กดลงชื่อเข้าใช้งาน ดังรูป (ข้อสังเกตให้ท่านเลือกภาษาไทย เพื่อง่ายในการใช้งานเมนูต่างๆ)
[](https://arit-manual.nstru.ac.th/uploads/images/gallery/2023-10/IIHimage.png)
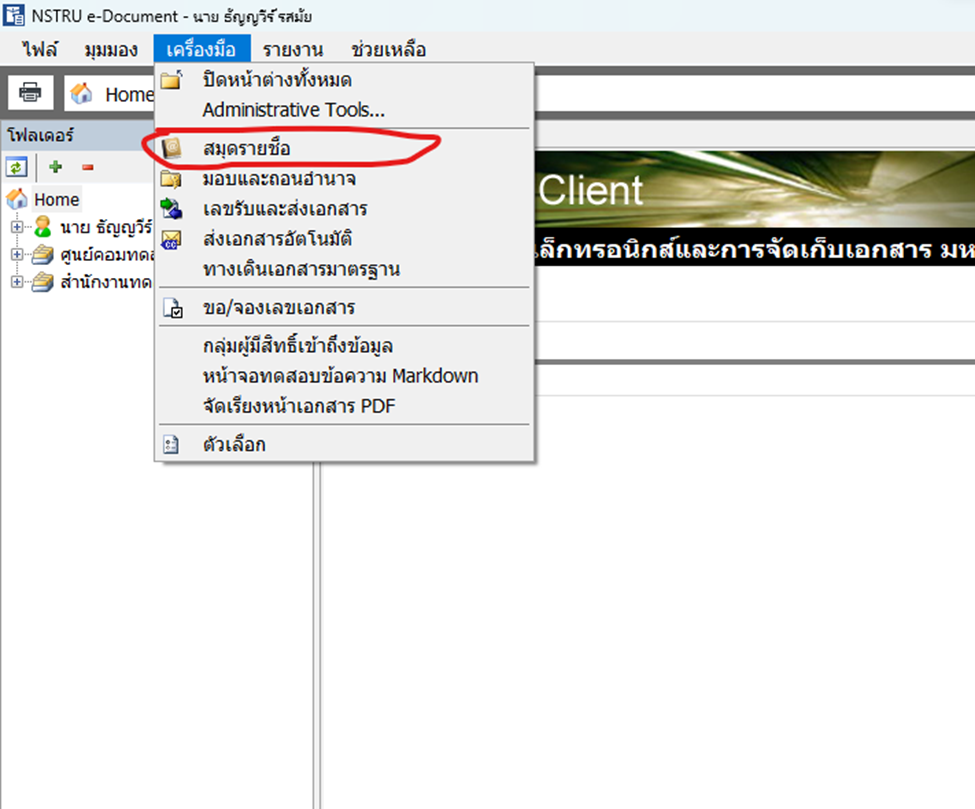
3\. ไปที่เมนู ->เครื่องมือ->สมุดรายชื่อ ดังรูป
[](https://arit-manual.nstru.ac.th/uploads/images/gallery/2023-10/vNUimage.png)
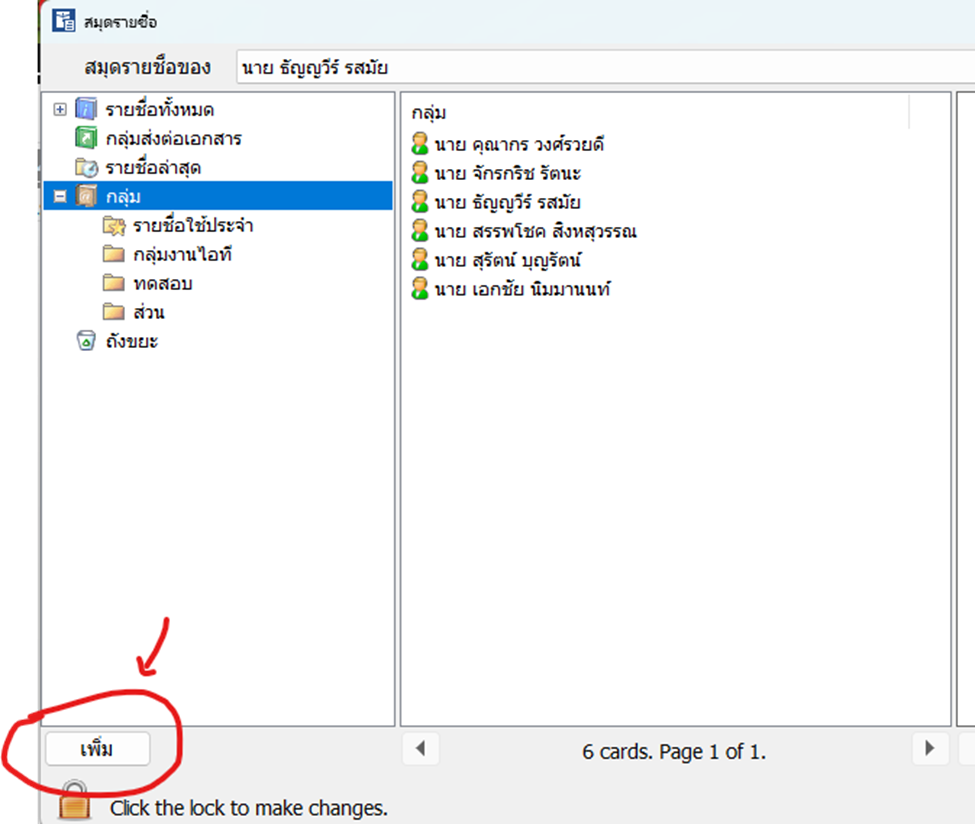
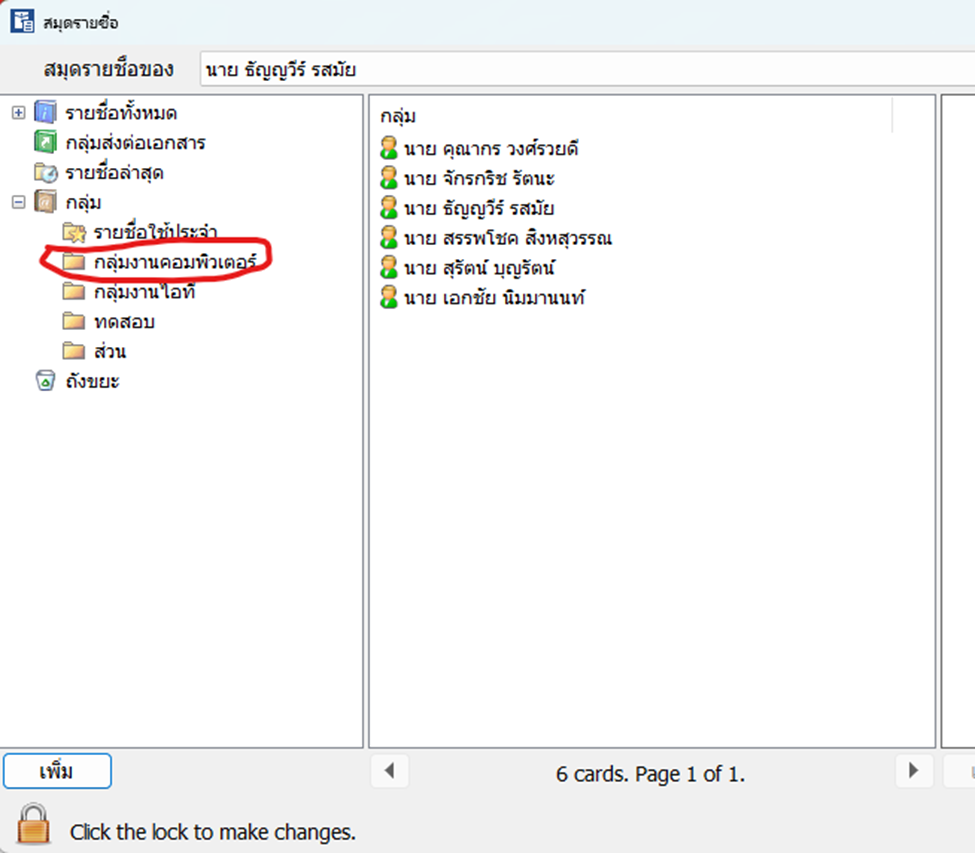
4\. ตรงสมุดรายชื่อ จะมีเมนูกลุ่ม ซึ่งจะสามารถสร้างกลุ่มตรงนี้ได้
[](https://arit-manual.nstru.ac.th/uploads/images/gallery/2023-10/SmGimage.png)
5\. การสร้างกลุ่ม ตัวอย่างจะสร้างกลุ่มชื่อ “กลุ่มงานคอมพิวเตอร์” โดยกดที่ปุ่มเพิ่มตรงซ้ายล่างดังรูป
[](https://arit-manual.nstru.ac.th/uploads/images/gallery/2023-10/NnJimage.png)
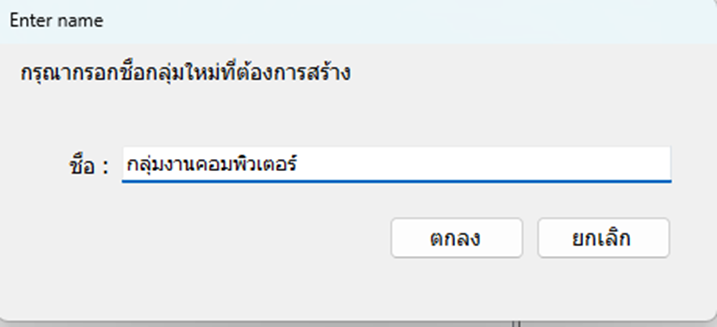
6\. ใส่ชื่อกลุ่มเสร็จแล้วกด ตกลง เสร็จแล้วจะปรากฏชื่อกลุ่ม “กลุ่มงานคอมพิวเตอร์”ตามรูป ด้านซ้ายมือดังรูป”
[](https://arit-manual.nstru.ac.th/uploads/images/gallery/2023-10/MStimage.png)
7\. จากนั้นให้กลับไปที่ปุ่ม รายชื่อทั้งหมด แล้วเลือกรายชื่อผู้ที่จะให้เข้ามาอยู่ในกลุ่ม เลือกได้แล้วให้คลิกรายชื่อนั้นๆ ค้างไว้แล้วลากมาวางตรงกล่องกลุ่มที่สร้างขึ้น ในที่นี่คือกลุ่ม“กลุ่มงานคอมพิวเตอร์”
8\. เสร็จแล้วกดปุ่มตกลง
[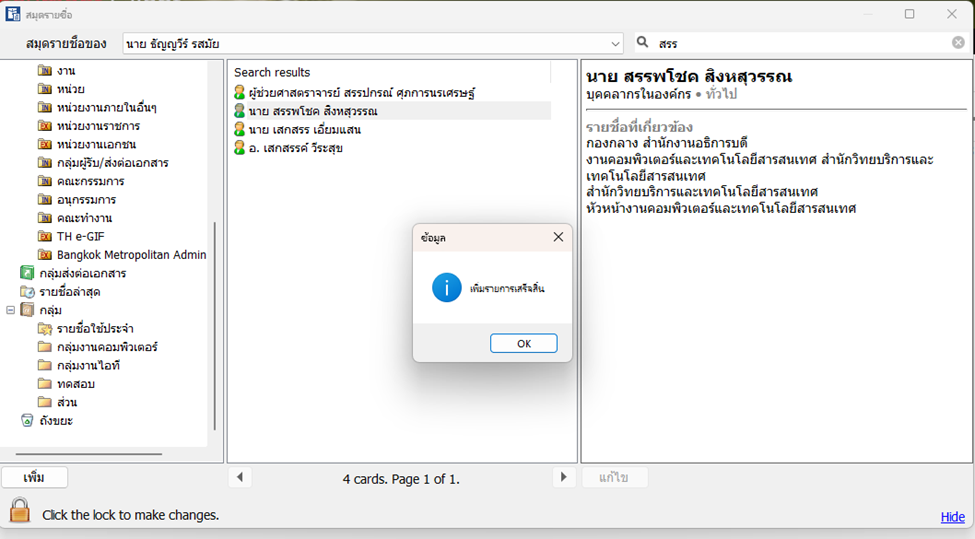](https://arit-manual.nstru.ac.th/uploads/images/gallery/2023-10/aQ8image.png)
9. ได้ผลดังรูป
[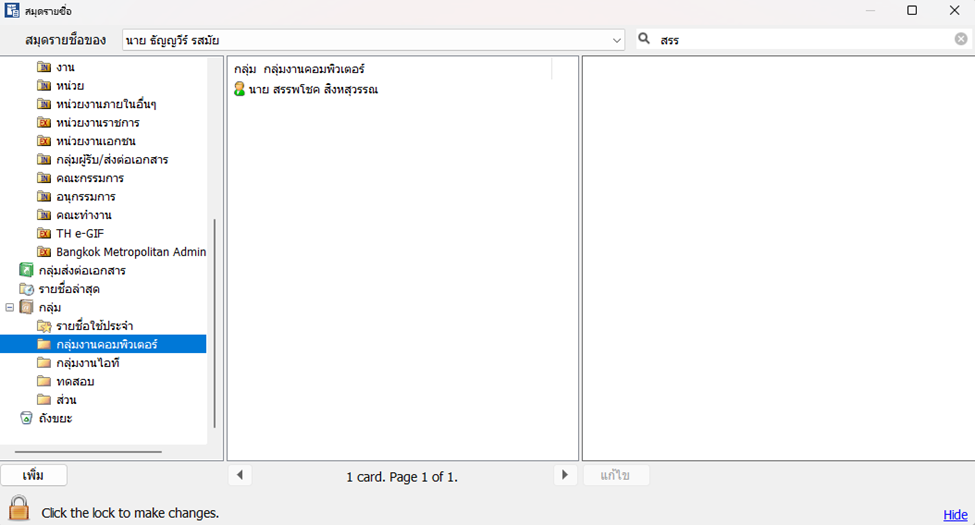](https://arit-manual.nstru.ac.th/uploads/images/gallery/2023-10/g9iimage.png)
10\. ท่านสามารถเลือกชื่อผุ้ใช้งานท่านอื่นเข้ามาในกลุ่มได้โดยใช้วิธีการเดียวกันนี้
[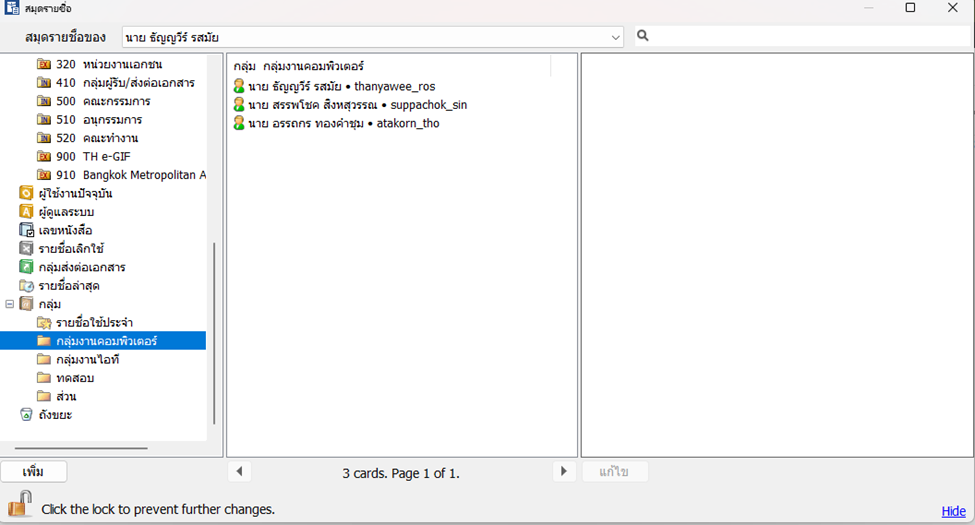](https://arit-manual.nstru.ac.th/uploads/images/gallery/2023-10/nBbimage.png)
11\. การนำไปใช้งาน ตัวอย่างทำการรับเอกสารแล้วส่งออกไปยังกลุ่มที่เลือก
[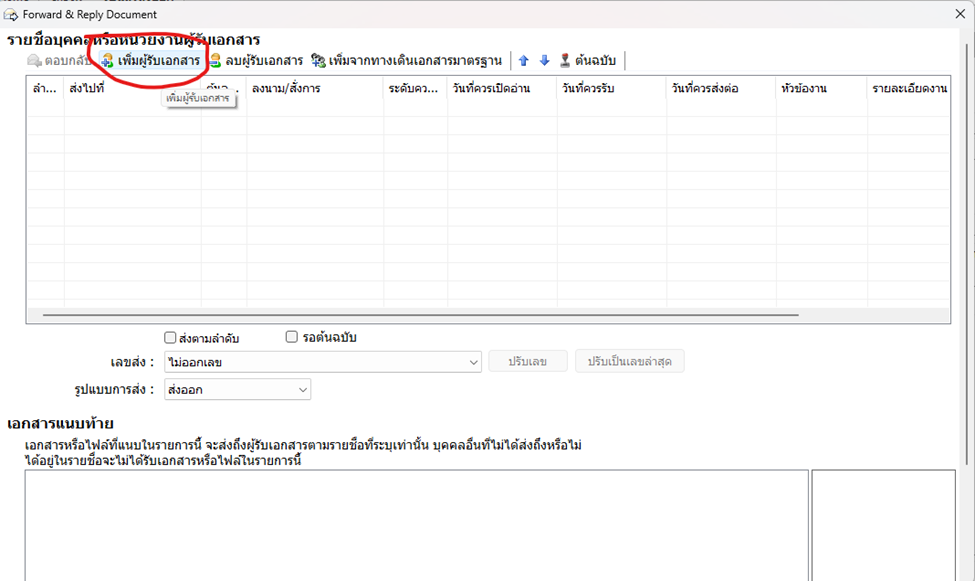](https://arit-manual.nstru.ac.th/uploads/images/gallery/2023-10/deCimage.png)
12\. จากนั้นให้เลือกกลุ่มที่ต้องการส่งถึง แล้วกด ตกลง
[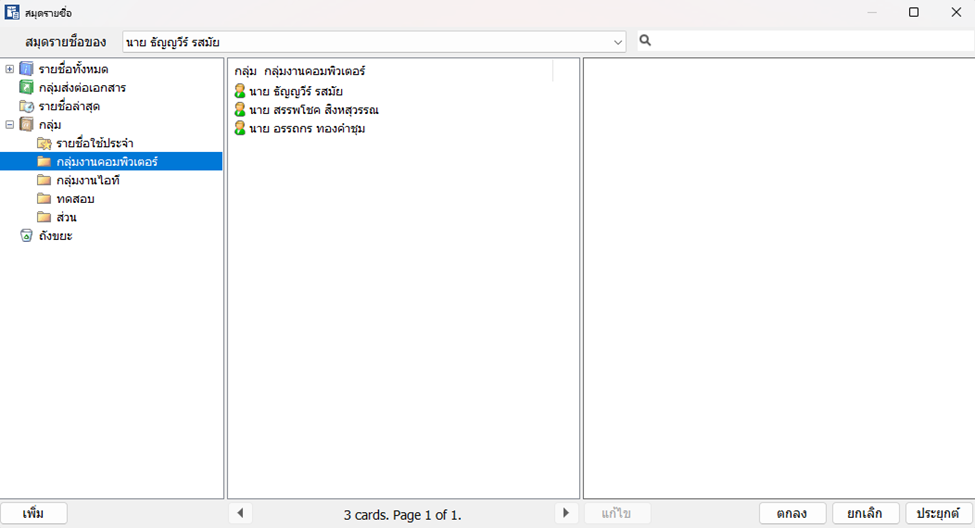](https://arit-manual.nstru.ac.th/uploads/images/gallery/2023-10/DZfimage.png)
13\. ผลลัพธ์เอกสารที่สร้างขึ้นจะถูกนำส่งไปยังผู้รับทั้งหมดตามที่ระบุอยู่ในกลุ่ม
[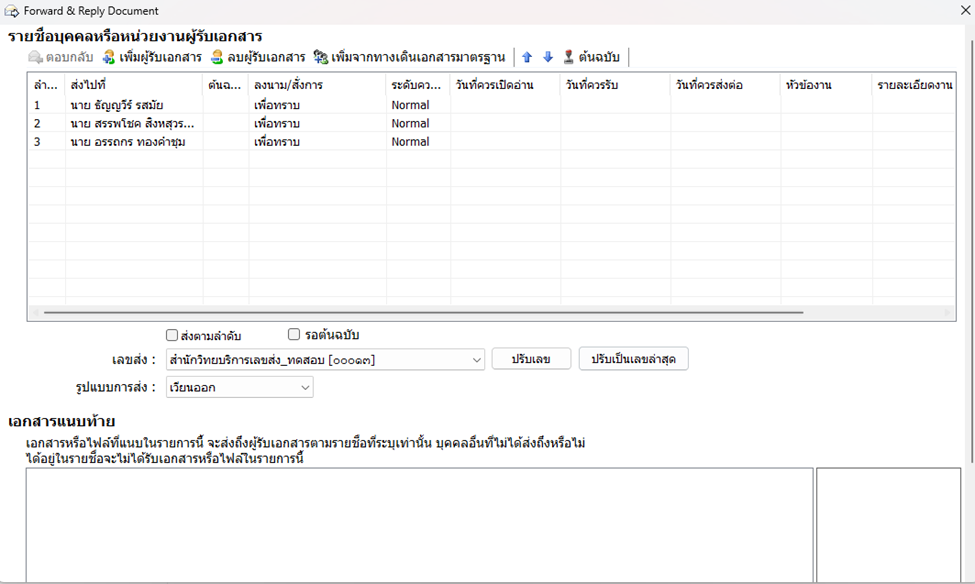](https://arit-manual.nstru.ac.th/uploads/images/gallery/2023-10/JXoimage.png)
14\. หลังจากนั้นท่านสามารถดำเนินการต่อไปได้เล
# การกำหนดพื้นที่แสดงผลลายเซ็นอิเล็กทรอนิกส์
ผู้ใช้สามารถกำหนดพื้นที่แสดงผลลายเซ็นอิเล็กทรอนิกส์ บนเอกสารที่เสนอได้โดยมีขั้นตอนการดำเนินการดังต่อไปนี้
1\. สร้างเอกสาร
2\. เพิ่มเอกสารแนบ
[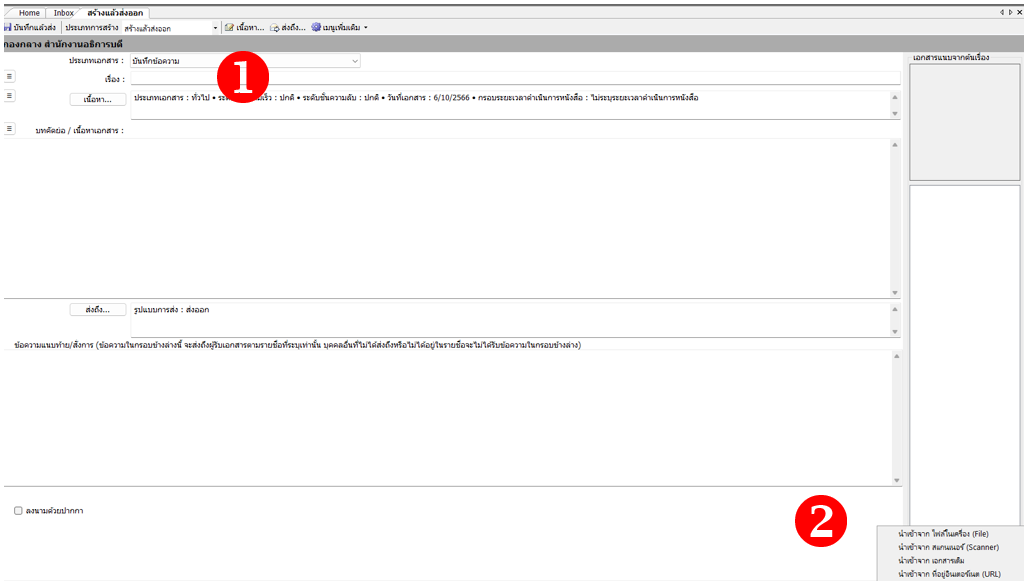](https://arit-manual.nstru.ac.th/uploads/images/gallery/2023-10/1Amimage.png)
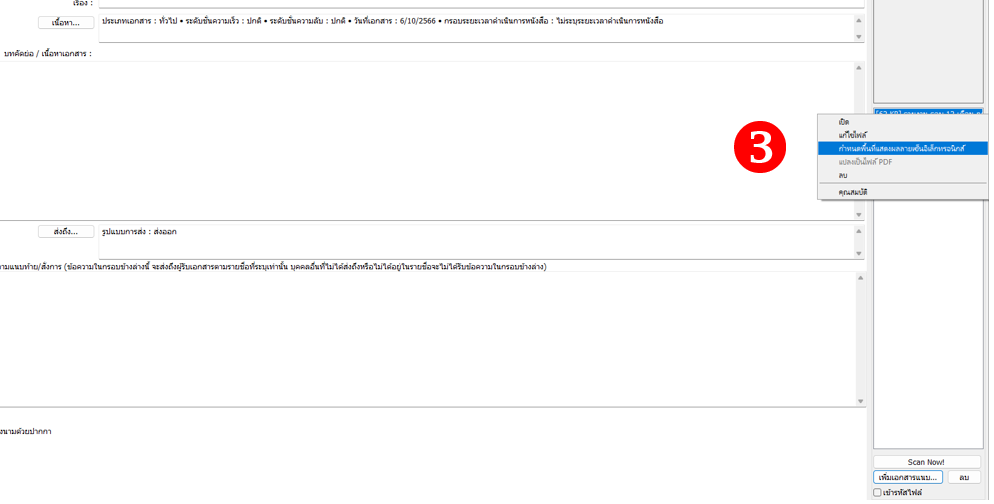
3\. คลิกขวา เลือกกำหนดพื้นที่แสดงผลลายเซ็นอิเล็กทรอนิกส์
[](https://arit-manual.nstru.ac.th/uploads/images/gallery/2023-10/Tbgimage.png)
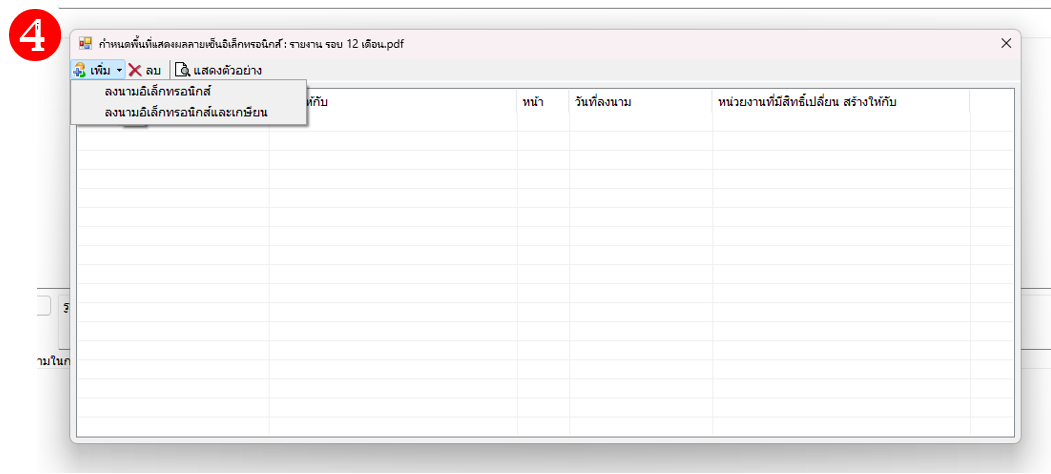
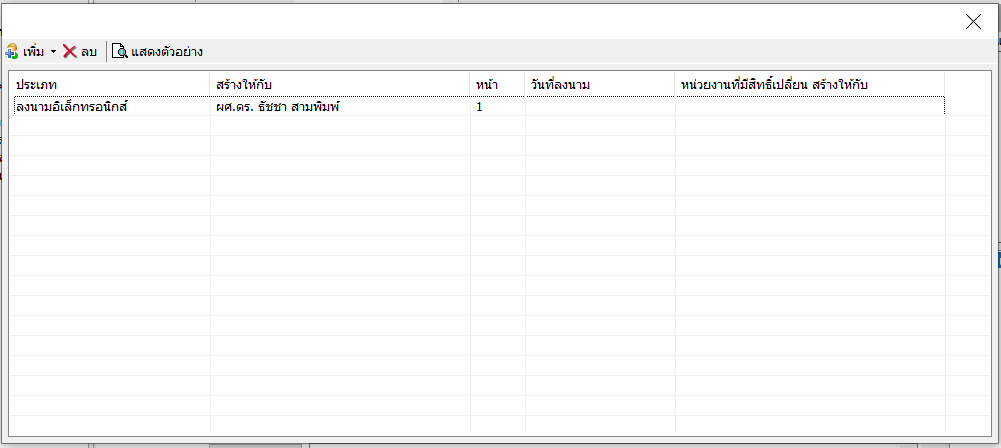
4\. คลิกเพิ่ม เลือกลงนามอิเล็กทรอนิกส์ หรือลงนามอิเล็กทรอนิกส์และเกษียณ (แล้วแต่กรณี)
[](https://arit-manual.nstru.ac.th/uploads/images/gallery/2023-10/HBoimage.png)
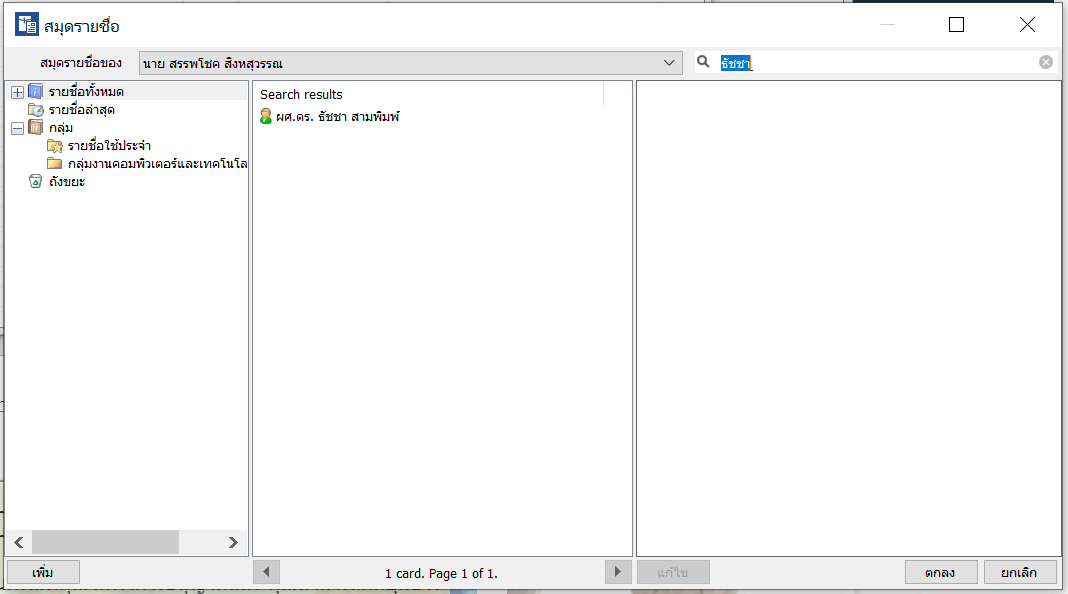
5\. เลือก ผู้ลงนาม โดยให้เลือกชื่อคนเท่านั้นห้ามเลือกตำแหน่ง เพราะลายเซ็นอิเล็คทรอนิกส์นั้นจะผูกติดกับชื่อผู้ใช้งานเท่านั้น \*\*\*\* หากท่านเลือกตำแหน่งระบบจะแสดงผลลายเซ็นต์ต่อท่ายจากเอกสารท่าน\*\*\*\* ซึ่งตอนที่ส่งไปยังปลายทางให้ผู้ลงนามเลือกตำแหน่งของตนเองภายหลัง อ่านรายละเอียดได้จาก[คู่มือผู้บริหาร](https://edoc.nstru.ac.th/DocClient/download/MAN_UW-NSRU66-EDOC-02-EDOC_EX.pdf)
[](https://arit-manual.nstru.ac.th/uploads/images/gallery/2023-10/yKnimage.png)
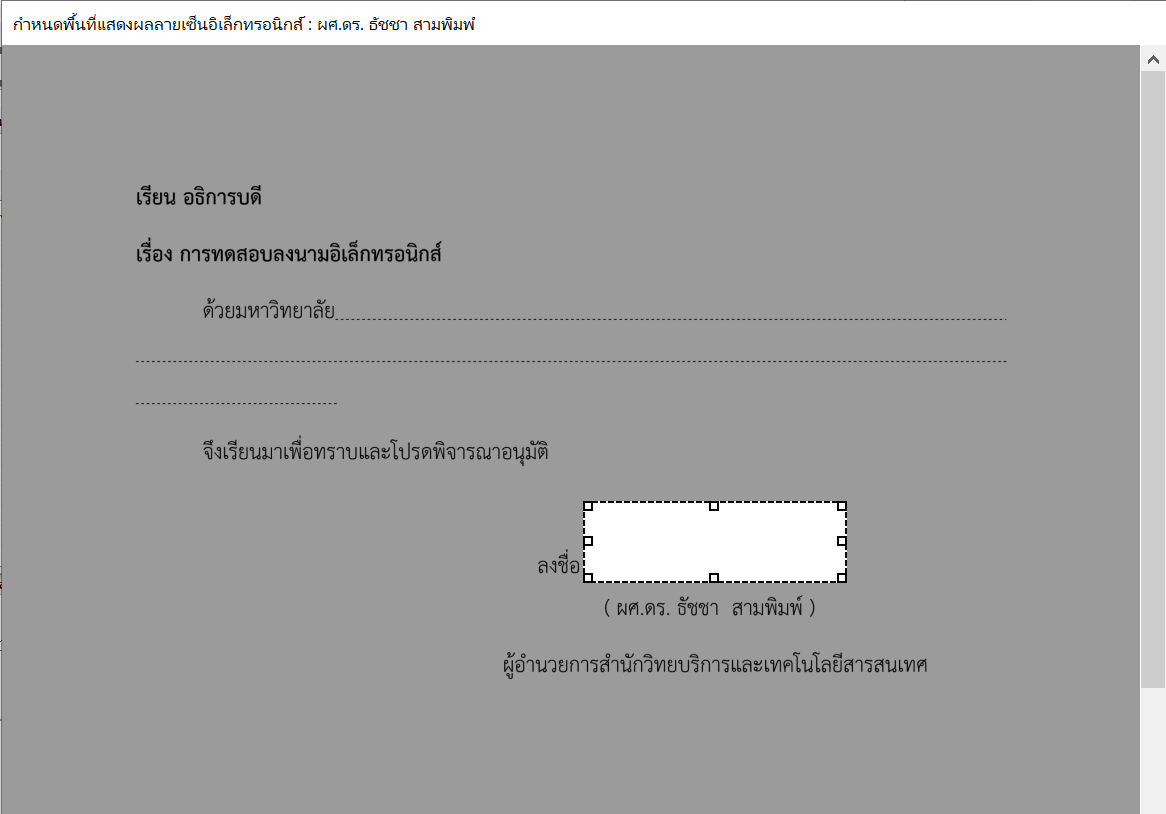
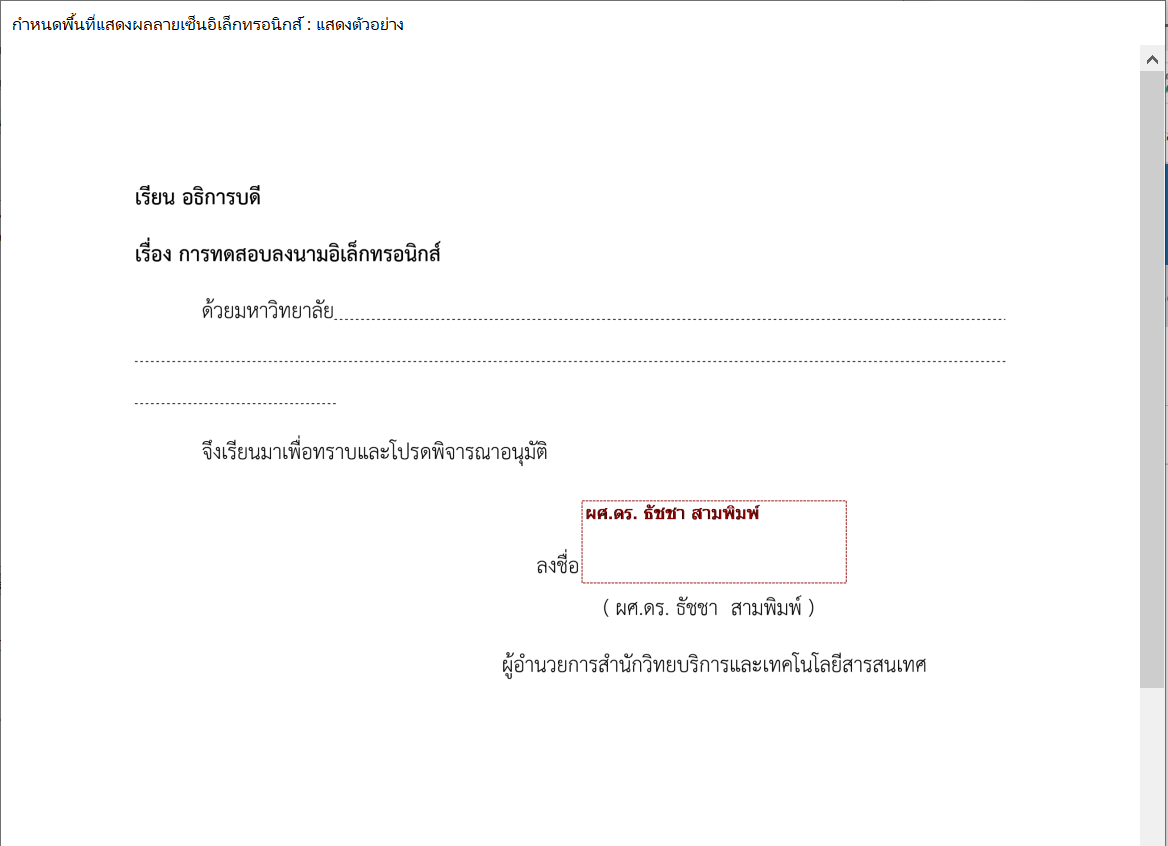
6\. เลือกพื้นที่ในการลงนามในเอกสาร
[](https://arit-manual.nstru.ac.th/uploads/images/gallery/2023-10/t8Vimage.png)
คลิกปุ่ม ตกลง เพื่อบันทึกชื่อผู้ลงนาม
[](https://arit-manual.nstru.ac.th/uploads/images/gallery/2023-10/JBNimage.png)
[](https://arit-manual.nstru.ac.th/uploads/images/gallery/2023-10/OxPimage.png)
เมื่อบันทึกพื้นที่ในการลงนามเรียบร้อยแล้วก็สามารถดำเนินการจัดส่งไปยังผู้ลงนาม จากนั้นเมื่อผู้รับลงนามเรียบร้อยแล้ว ลายมือชื่อของผู้ลงนามจะปรากฎในกรอบที่ผู้สร้างได้กำหนดไว้
# การลงนามหนังสือด้วยลายมือชื่ออิเล็กทรอนิกส์
การลงนามหนังสือด้วยลายมือชื่ออิเล็กทรอนิกส์ ผู้ลงนามต้องดำเนินขอสร้างลายมือชื่ออิเล็กทรอนิกส์จากสำนักวิทยบริการและเทคโนโลยีสารสนเทศ โดยสามารถยืนขอผ่านแบบฟอร์มลงทะเบียนขอสร้างลายมือชื่ออิเล็กทรอนิกส์ (Digital Signature) ของมหาวิทยาลัยราชภัฏนครศรีธรรมราช ดังลิงค์ด้านล่าง
ฟอร์มลงทะเบียนขอสร้างลายมือชื่ออิเล็กทรอนิกส์ (Digital Signature)
[https://forms.gle/dQS9RwUmin2P3Mrx7](https://forms.gle/dQS9RwUmin2P3Mrx7)
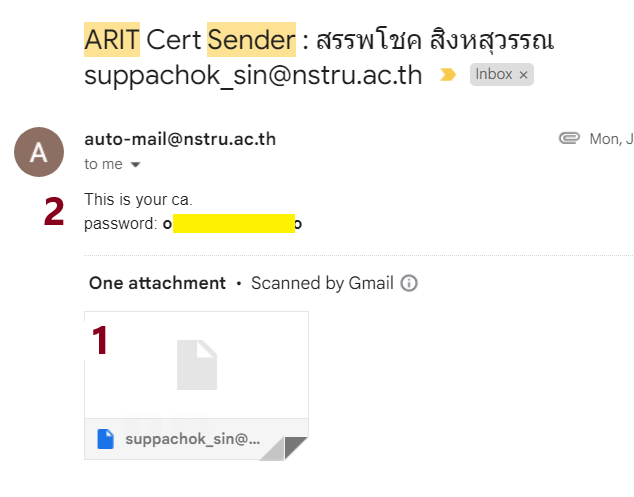
ไฟล์ลายมือชื่ออิเล็กทรอนิกส์ที่ได้รับจะประกอบด้วย
1\) ไฟล์ใบรับรองลายมือชื่ออิเล็กทรอนิกส์
2\) รหัสผ่านสำหรับใช้งาน
[](https://arit-manual.nstru.ac.th/uploads/images/gallery/2023-10/bSeimage.png)
เมื่อได้รับลายมือชื่ออิเล็กทรอนิกส์มาแล้วสามารถเข้าไปลงนามเอกสารในระบบ e-Document ได้โดยดำเนินการต่อไปนี้
1\) ให้ดำเนินการดาวน์โหลดไฟล์ลายมือชื่ออิเล็กทรอนิกส์ลงบนเครื่องคอมพิวเตอร์ซึ่งใช้ลงลายมือชื่อ
[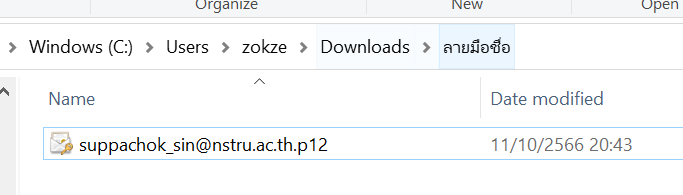](https://arit-manual.nstru.ac.th/uploads/images/gallery/2023-10/EXbimage.png)
2\) เข้าสู่ระบบ e-Document จากนั้นทำการยืนยันตัวตน[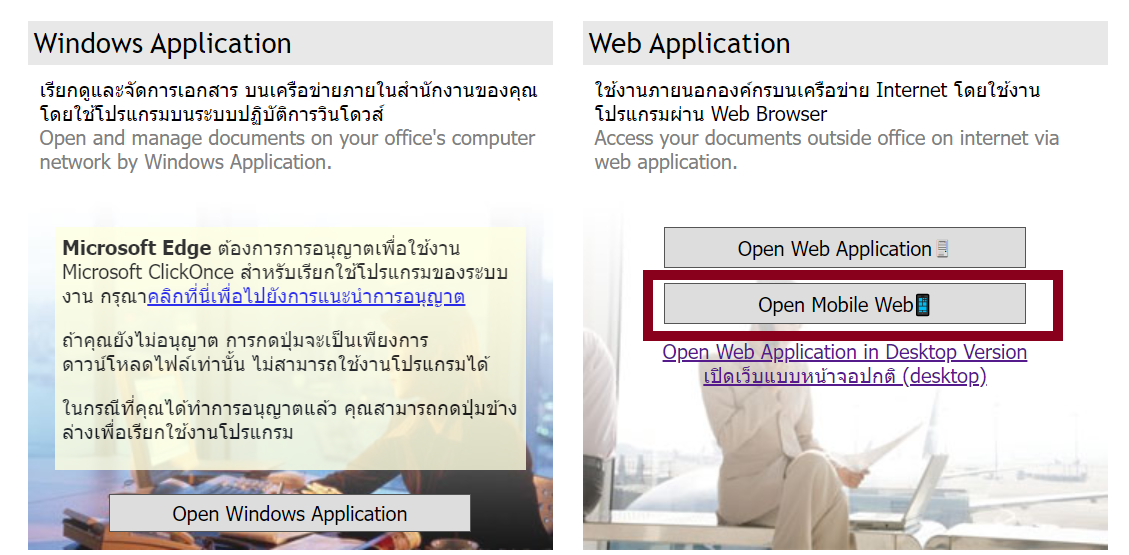](https://arit-manual.nstru.ac.th/uploads/images/gallery/2023-10/lHzimage.png)
[](https://arit-manual.nstru.ac.th/uploads/images/gallery/2023-10/2t9image.png)
2\) เลือกหนังสือที่ต้องการลงนามอิเล็กทรอนิกส์ จากนั้นคลิกเมนู ลงนาม
[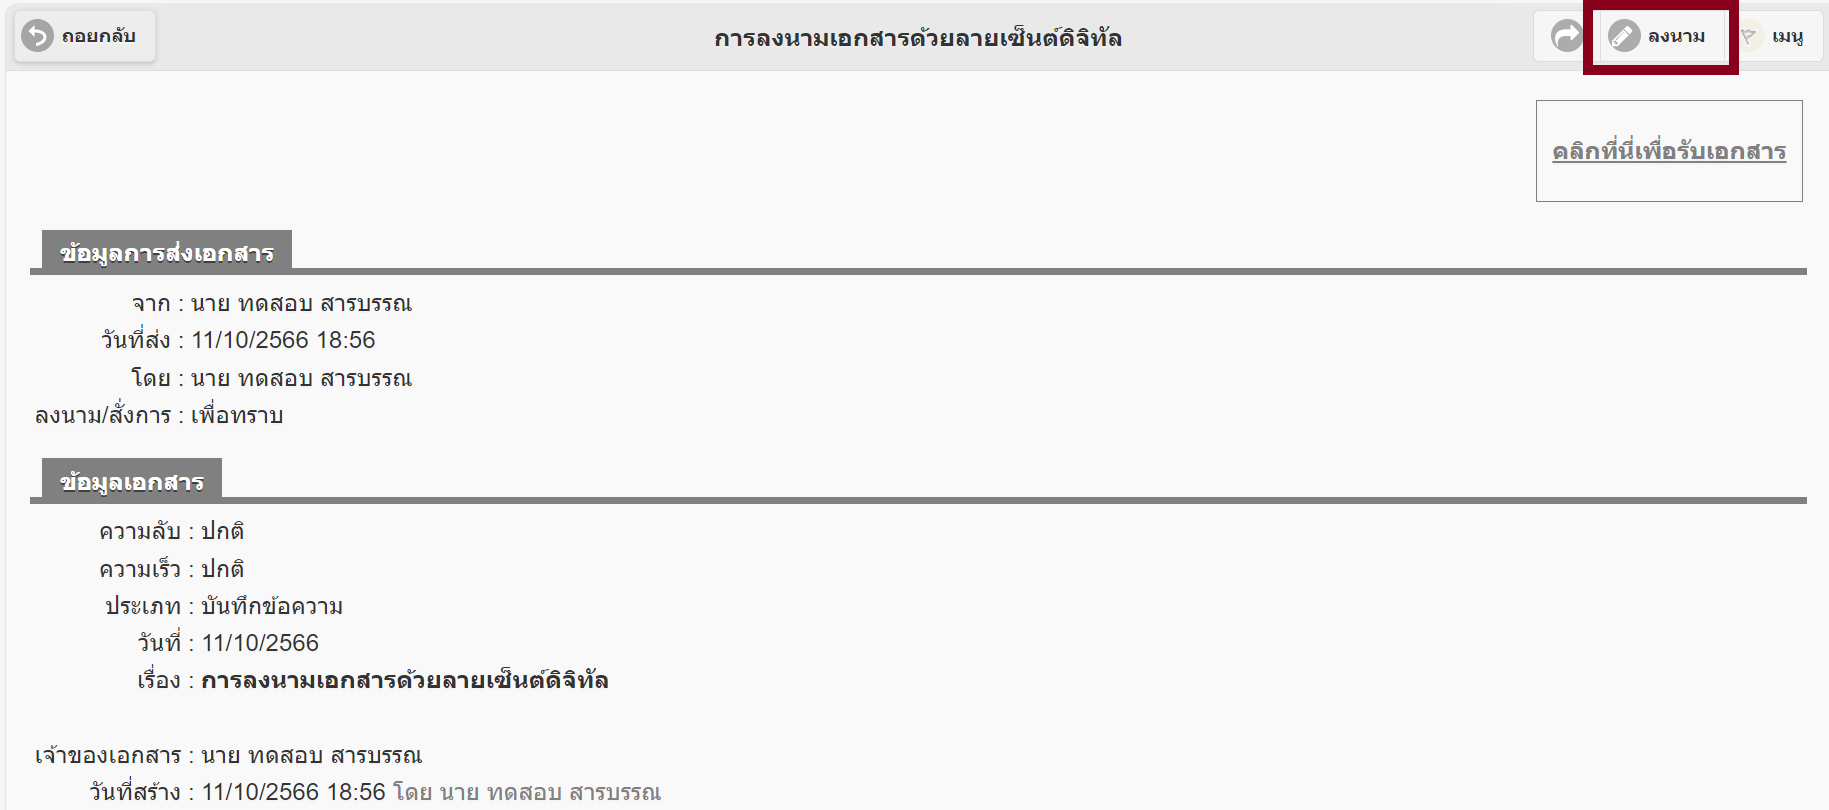](https://arit-manual.nstru.ac.th/uploads/images/gallery/2023-10/4Z9image.png)
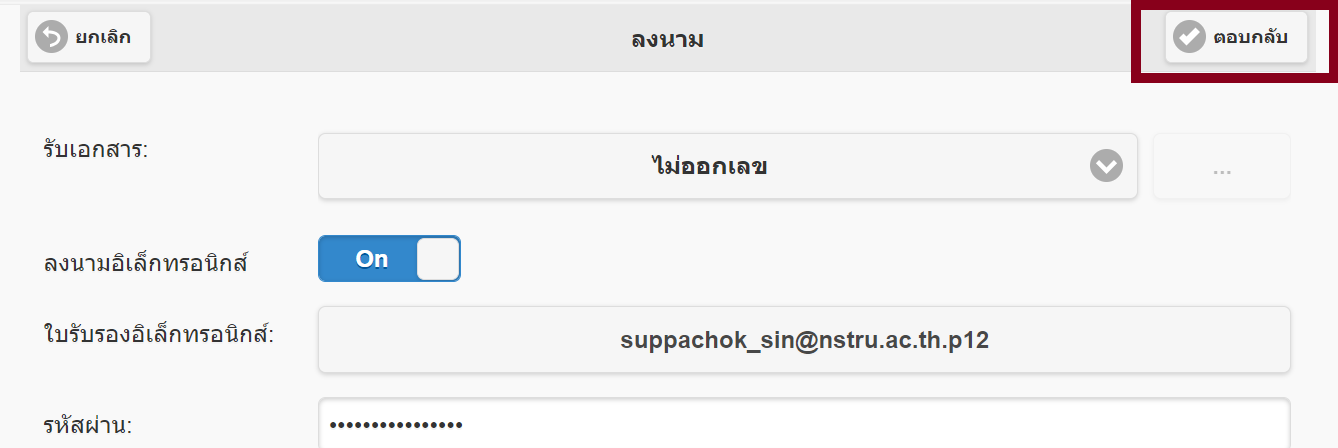
3\) กรณีที่ยังไม่ได้ลงรับเอกสาร ให้เลือกลงรับเอกสารเสียก่อนโดยสามารถเลือกได้ 2 แบบ ดังนี้
(1) **ไม่ออกเลข** ใช้เมื่อกรณีลงนามเอกสารที่ยังไม่ได้ส่งออกจากหน่วยงาน หรือเอกสารยังไม่มีการสร้างเลขส่ง
(2) **ใช้หมายเลขเดิม จากบุคคลหรือหน่วยงานก่อนหน้า** ใช้เมื่อกรณีต้องการลงนามและเกษียณต่อไปยังบุคคลอื่นเพื่อปฏิบัติงาน หรือเอกสารที่มีการลงรับจากสำนักงานแล้ว
[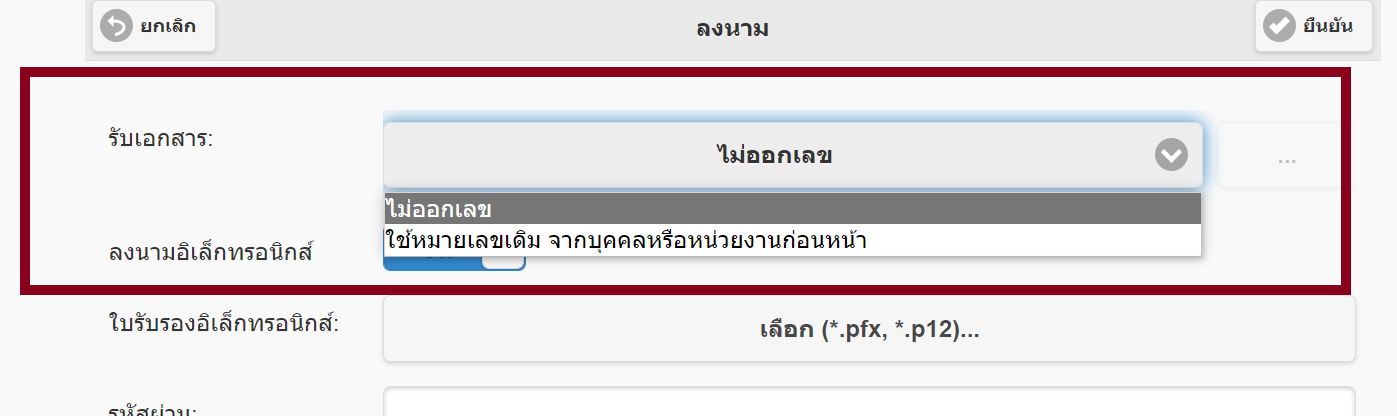](https://arit-manual.nstru.ac.th/uploads/images/gallery/2023-10/Lqaimage.png)
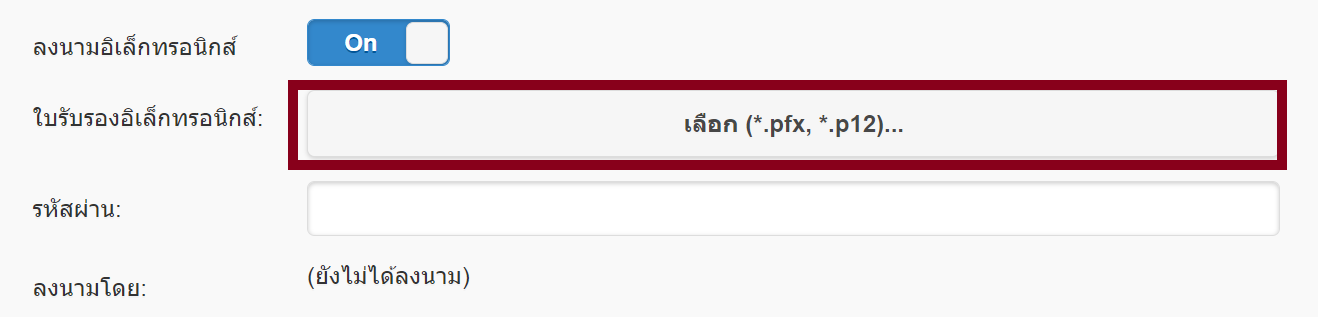
4\) คลิกเปิดการลงนามอิเล็กทรอนิกส์ กรณีที่ปุ่มนี้ปิดอยู่ให้เลือกเปิด เพื่อดำเนินการลงนาม
[](https://arit-manual.nstru.ac.th/uploads/images/gallery/2023-10/HqDimage.png)
5\) คลิกเลือกไฟล์ใบรับรองอิเล็กทรอนิกส์ (ไฟล์ที่ลงท้ายด้วย .p12)
[](https://arit-manual.nstru.ac.th/uploads/images/gallery/2023-10/Kofimage.png)
[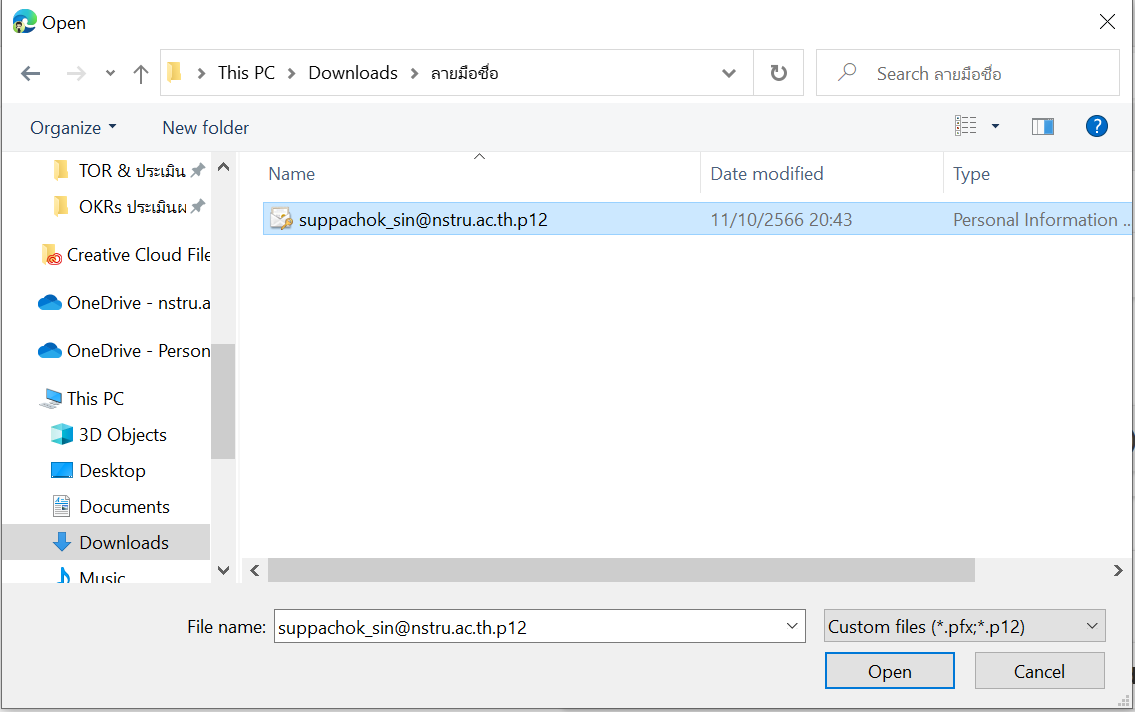](https://arit-manual.nstru.ac.th/uploads/images/gallery/2023-10/wehimage.png)
[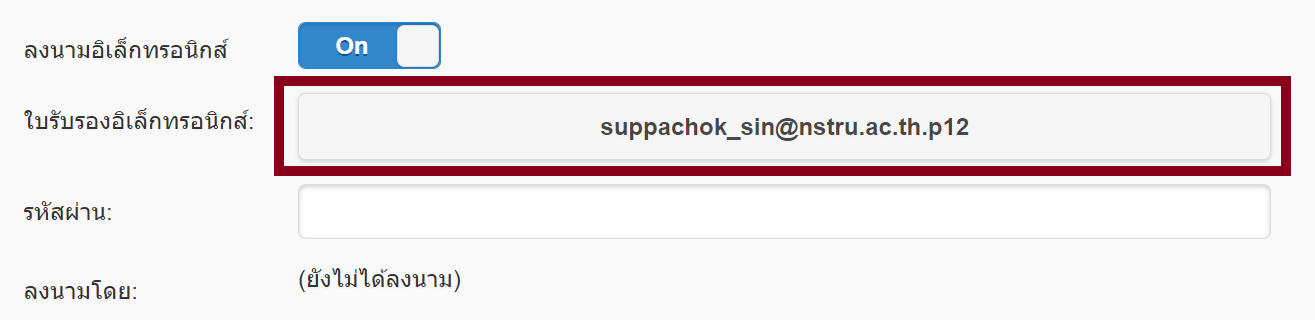](https://arit-manual.nstru.ac.th/uploads/images/gallery/2023-10/wAdimage.png)
6\) คัดลอกรหัสผ่านที่ได้รับจากอีเมล ใส่ลงในช่องรหัสผ่านดังรูป
[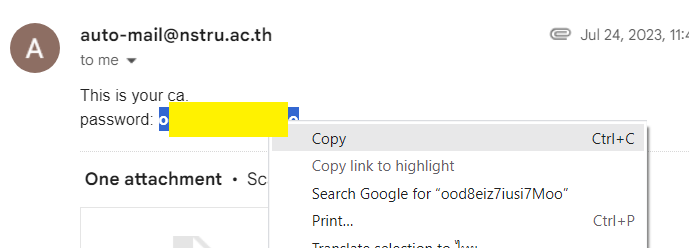](https://arit-manual.nstru.ac.th/uploads/images/gallery/2023-10/L9Uimage.png)
[](https://arit-manual.nstru.ac.th/uploads/images/gallery/2023-10/4RTimage.png)
7\) เลือกชื่อ ตำแหน่งผู้ลงนาม กรณีที่ไม่มีชื่อตำแหน่งปรากฎสามารถกดเพิ่มชื่อได้ที่ปุ่มเพิ่มด้านลางกล่องตัวเลือก
[](https://arit-manual.nstru.ac.th/uploads/images/gallery/2023-10/HRrimage.png)
8\) คลิกเลือกความคิดเห็นถึงผู้ส่ง และใส่ข้อความที่ต้องการเกษียณกลับไปยังผู้ส่ง โดยความเห็นและข้อความเกษียณจะโดนนำไปแทรกไว้ในไฟล์หนังสือที่แนบมา หลังลงนาม โดยพื้นที่ที่แสดงจะกำหนดโดยผู้สร้างหรือผู้ส่งหนังสือ
[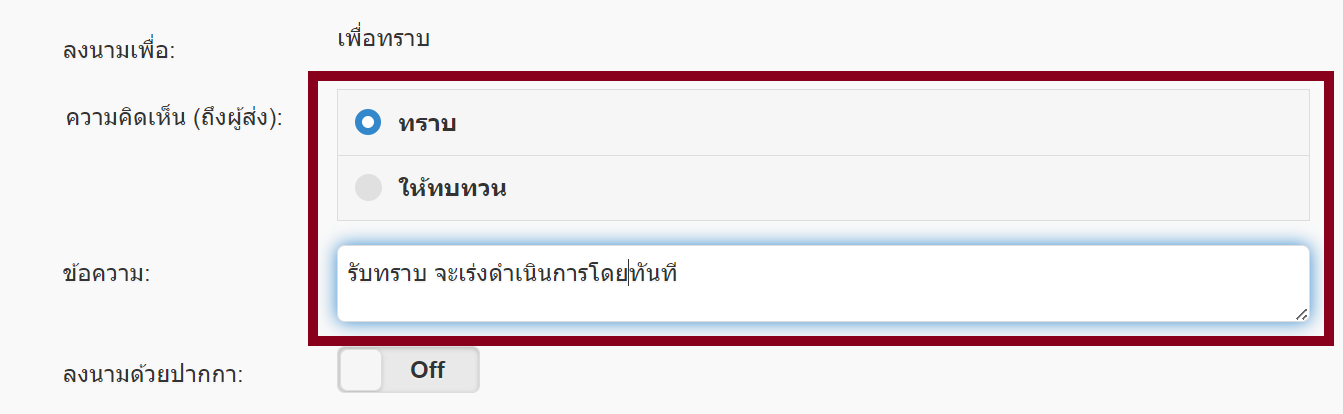](https://arit-manual.nstru.ac.th/uploads/images/gallery/2023-10/PyYimage.png)
9\) กรณีที่ผู้ใช้ยังไม่สร้างภาพแสดงลายมือชื่อ สามารถเลือก **เปิด** การลงนามลายมือชื่อโดยใช้ปากกา เพื่อลงนามผ่านอุปกรณ์ได้เลย หากมีการสร้างภาพแสดงลายมือชื่อไว้ก่อนแล้ว ระบบจะนำภาพดังกล่าวมาแสดงในเอกสาร สามารถดูวิธีการสร้างภาพลายมือชื่อ ได้ที่ [https://arit-manual.nstru.ac.th/books/e-document/page/a97da](https://arit-manual.nstru.ac.th/books/e-document/page/a97da)
[](https://arit-manual.nstru.ac.th/uploads/images/gallery/2023-10/5xpimage.png)
(1) ภาพลายมือชื่อที่มีการสร้างหรืออัพโหลดไว้เรียบร้อยแล้ว
[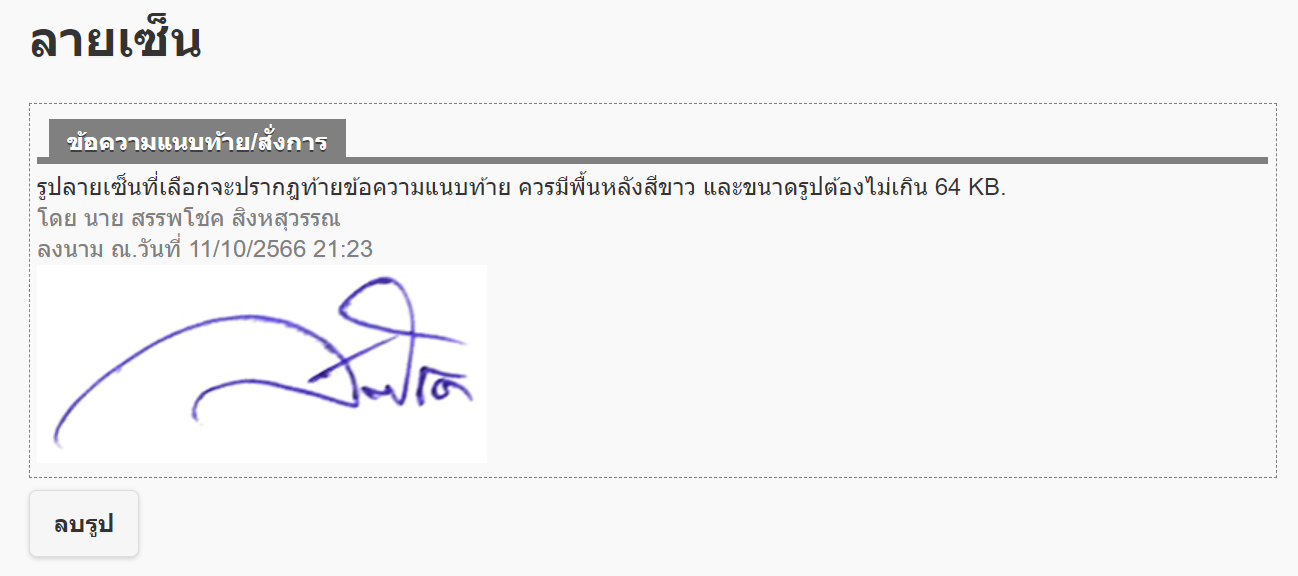](https://arit-manual.nstru.ac.th/uploads/images/gallery/2023-10/8t8image.png)
(2) การลงนามด้วยปากกา โดยใช้อุปกรณ์เขียนลายมือชื่อใหม่
[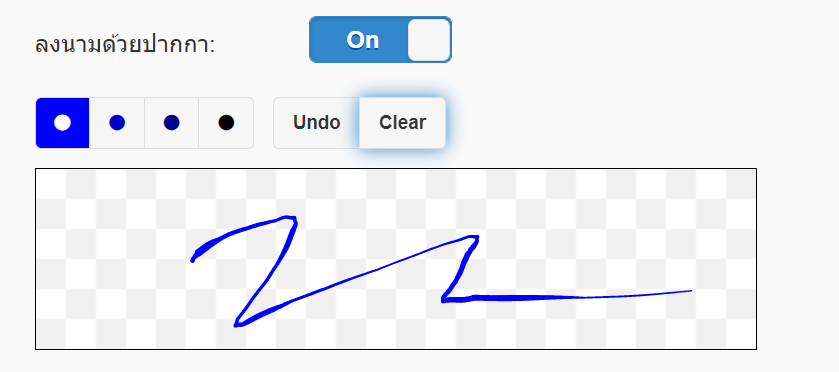](https://arit-manual.nstru.ac.th/uploads/images/gallery/2023-10/KFgimage.png)
10\) การตอบกลับแบบง่าย ใช้เลือกผู้ตอบกลับเมื่อทำการลงลายมือชื่อในเอกสารเรียบร้อยแล้ว
[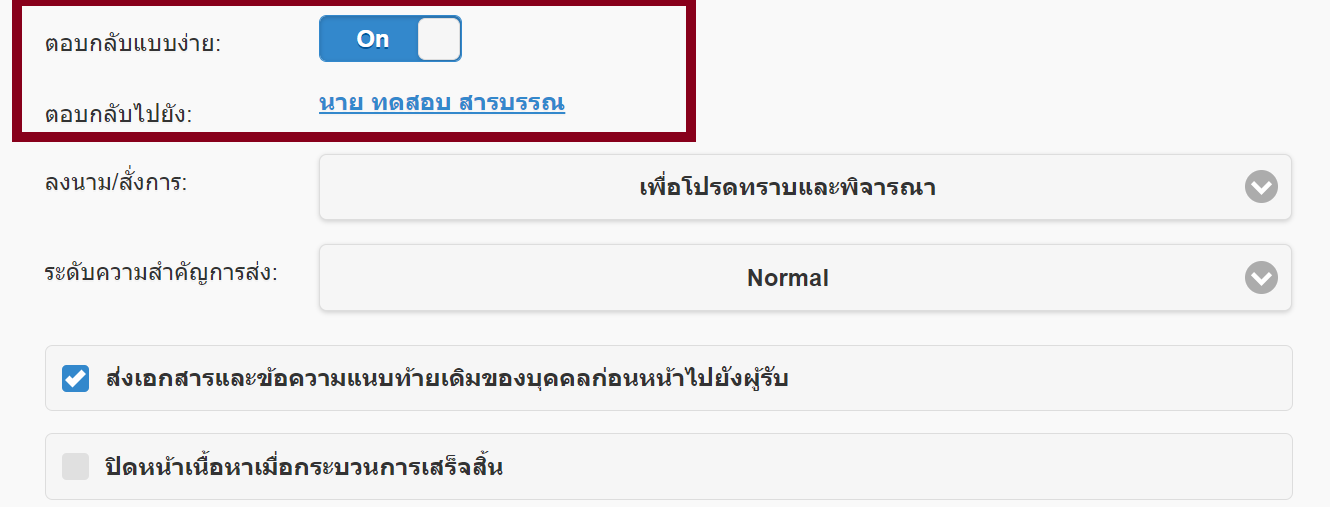](https://arit-manual.nstru.ac.th/uploads/images/gallery/2023-10/deiimage.png)
11\) เลือก รูปแบบการสั่งการ และระดับความสำคัญของเอกสารการส่ง ซึ่งหากไม่ต้องการเปลี่ยนแปลงก็สามารถข้ามขั้นตอนนี้ได้เลย
[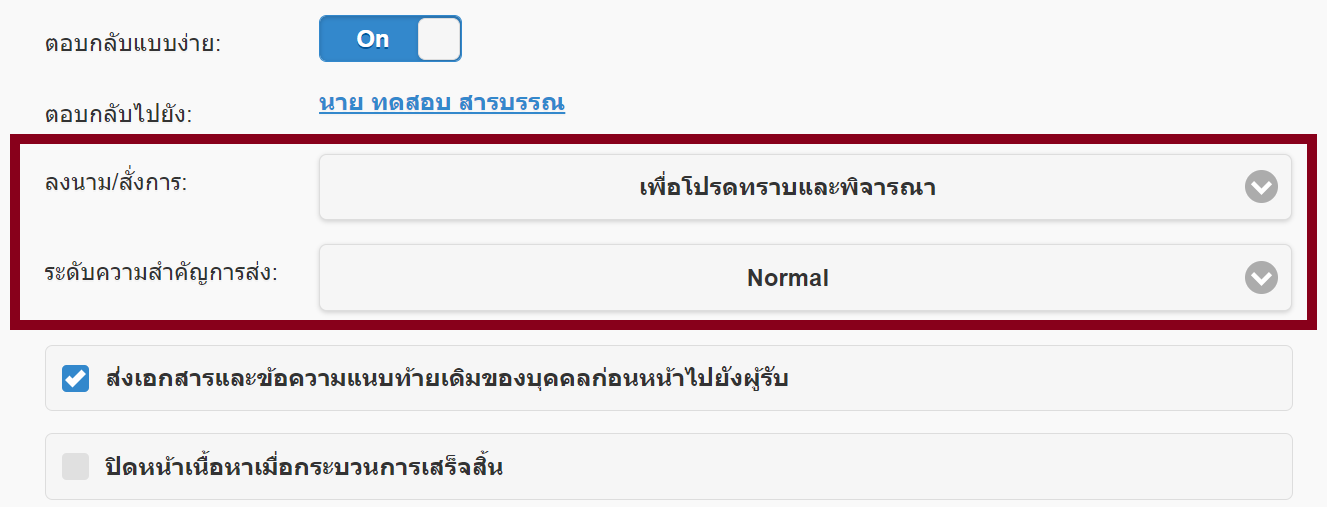](https://arit-manual.nstru.ac.th/uploads/images/gallery/2023-10/ZJeimage.png)
12\) ผู้ใช้สามารถเลือกได้ว่าให้ส่งเอกสารและข้อความแนบท้ายเดิมไปยังผู้รับต่อไปหรือไม่ รวมถึงสามารถเลือกปิดหน้าต่างการลงนามเมื่อกระบวนการลงนามเสร็จสิ้นได้
[](https://arit-manual.nstru.ac.th/uploads/images/gallery/2023-10/2bximage.png)
13\) คลิก ปุ่มตอบกลับ เพื่อให้ระบบดำเนินการลงนามในเอกสารและตอบกลับไปยังผู้ส่ง/ผู้รับที่กำหนดไว้
[](https://arit-manual.nstru.ac.th/uploads/images/gallery/2023-10/ViHimage.png)
เมื่อดำเนินการเสร็จสิ้นระบบจะทำการแนบลายมือชื่อลงไปในไฟล์เอกสารโดยอัตโนมัติดังรูป
การแสดงลายมือชื่อในเอกสาร
[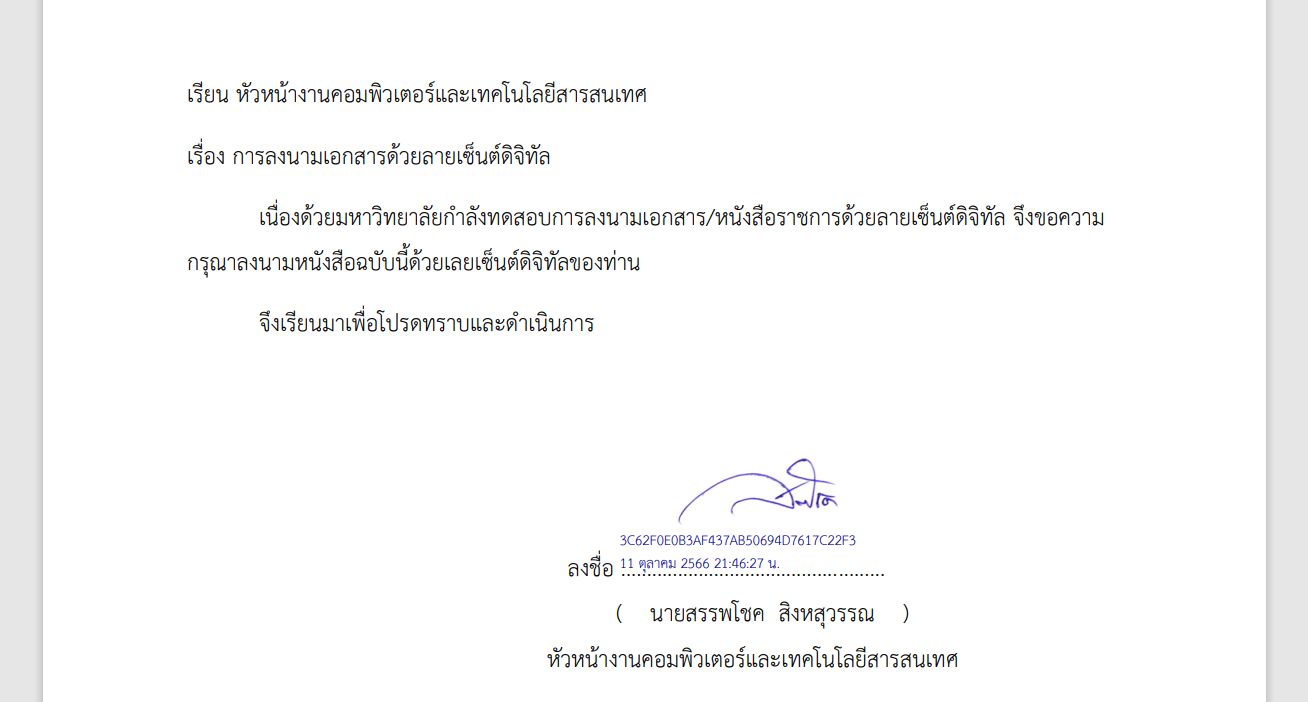](https://arit-manual.nstru.ac.th/uploads/images/gallery/2023-10/gEKimage.png)
การแสดงข้อความเกษียณ/สั่งการ
[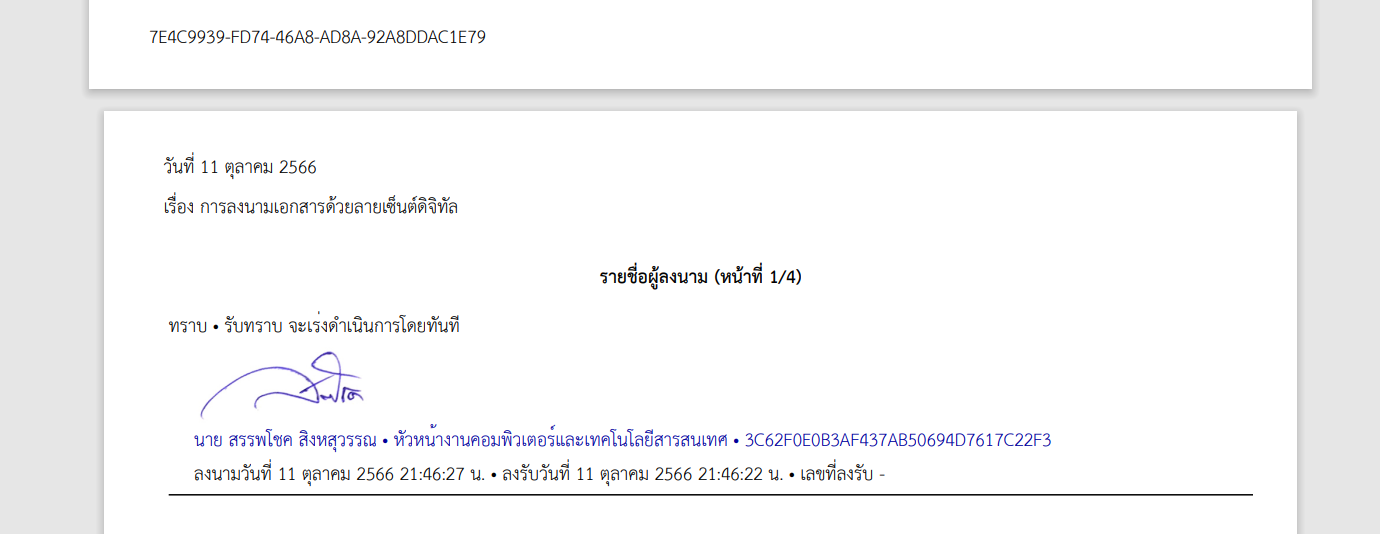](https://arit-manual.nstru.ac.th/uploads/images/gallery/2023-10/Mvjimage.png)
# การสร้างภาพลายมือชื่อสำหรับแสดงในเอกสารที่ลงนาม
ให้ล็อกอินเข้าสู่ระบบ e-Document จากนั้นคลิกที่เมนู [](https://arit-manual.nstru.ac.th/uploads/images/gallery/2023-10/utPimage.png) ด้านบนซ้ายของระบบ ดังรูป
[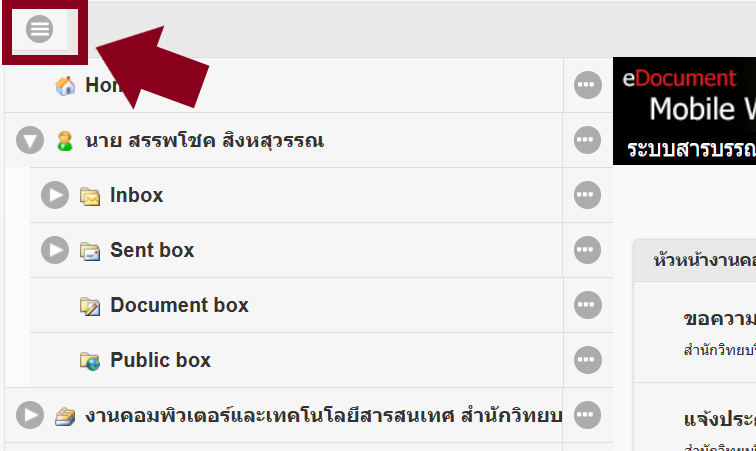](https://arit-manual.nstru.ac.th/uploads/images/gallery/2023-10/I7Zimage.png)
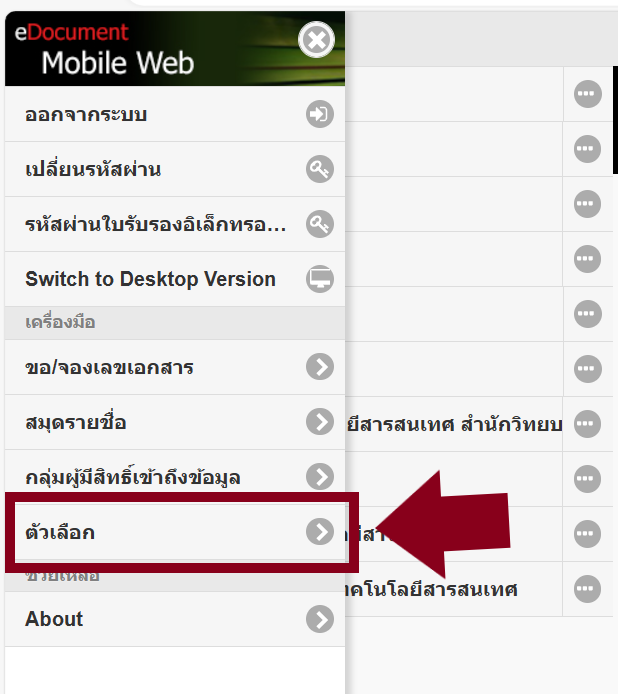
จากนั้นคลิกที่เมนู **ตัวเลือก** จะปรากฎหน้าสำหรับตั้งค่าการแจ้งเตือนและลายเซ็นชื่อ ดังรูป
| [](https://arit-manual.nstru.ac.th/uploads/images/gallery/2023-10/0I4image.png) | [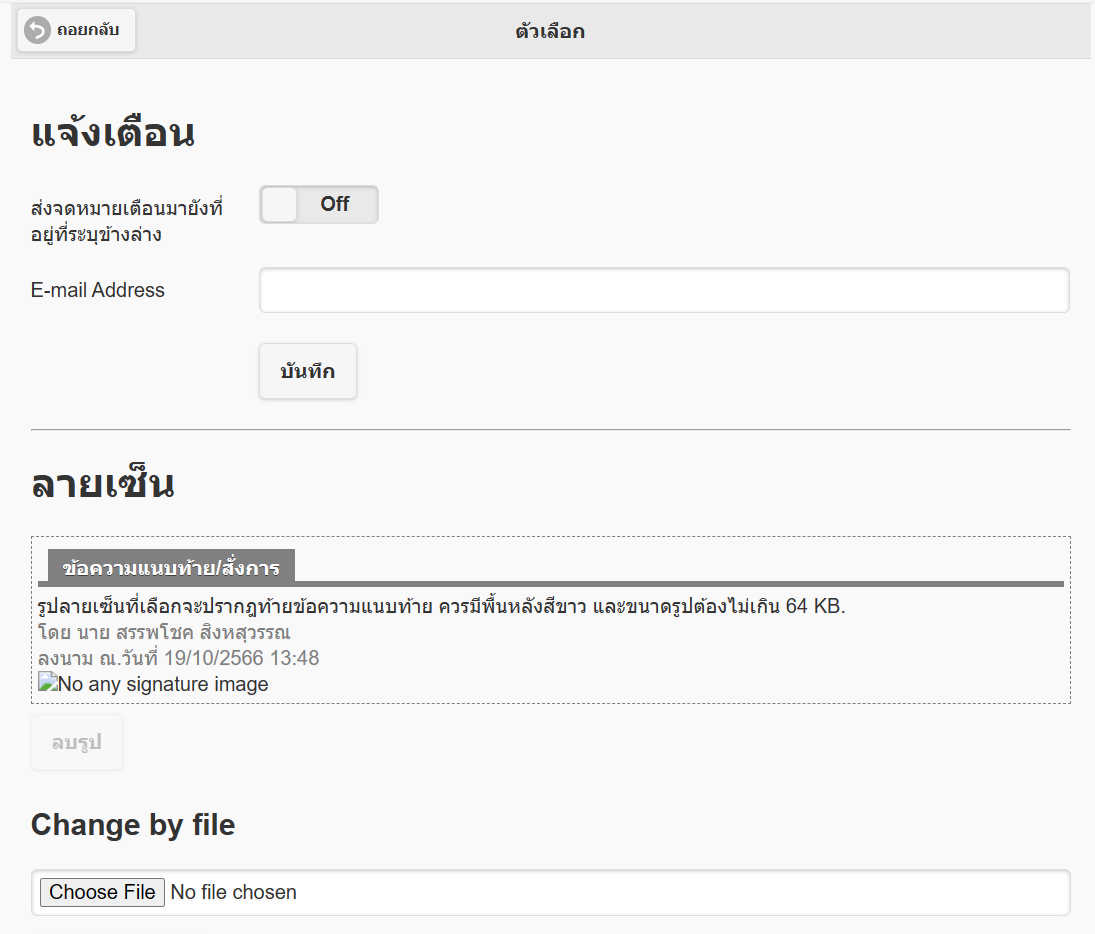](https://arit-manual.nstru.ac.th/uploads/images/gallery/2023-10/z8Oimage.png) |
โดยการตั้งค่าลายเซ็นสามารถดำเนินการได้ 2 วิธี คือ
1. วิธีการแนบไฟล์ภาพ
2. วิธีการวาดลายเซ็นชื่อผ่านระบบ
### วิธีที่ 1 การแนบไฟล์ภาพ
[](https://arit-manual.nstru.ac.th/uploads/images/gallery/2023-10/qEuimage.png)
วิธีการนี้จะเป็นการอัพโหลดรูปภาพลายเซ็นชื่อที่มีอยู่ในเครื่องคอมพิวเตอร์ของเราขึ้นไปยังระบบ โดยให้คลิกปุ่ม Choose file เพื่อเลือกรูปลายเซ็นที่จัดเก็บไว้ในเครื่องดังรูป
[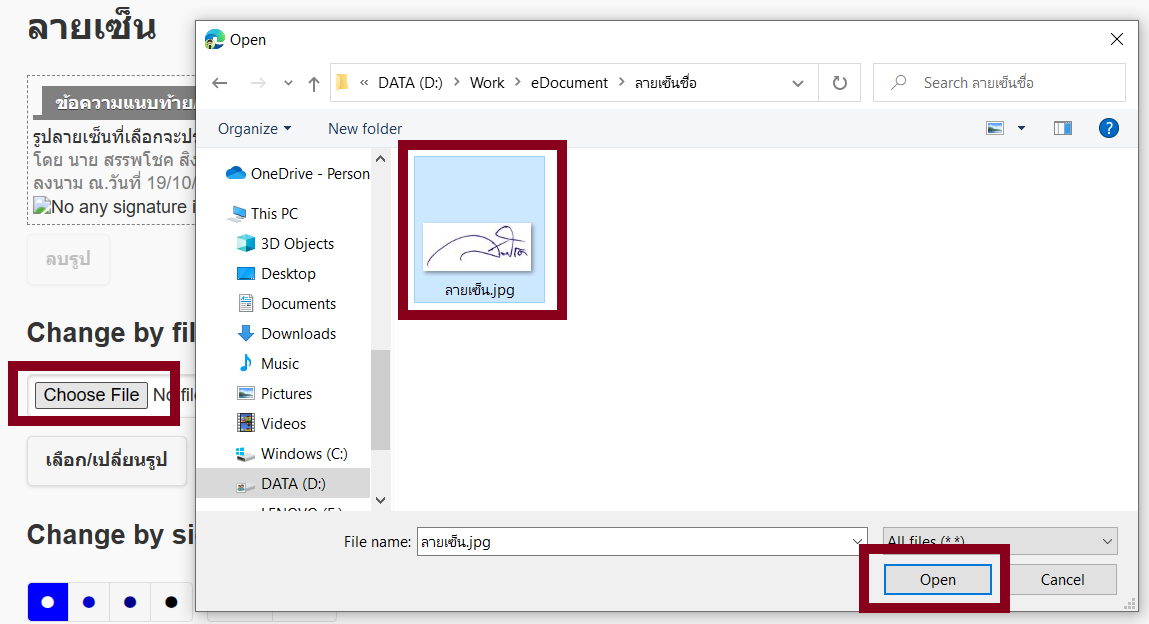](https://arit-manual.nstru.ac.th/uploads/images/gallery/2023-10/pF6image.png)
จากนั้นคลิก เลือก/เปลี่ยนรูป เพื่ออัพโหลดภาพลายเซ็นเข้าสู่ระบบ
[](https://arit-manual.nstru.ac.th/uploads/images/gallery/2023-10/3plimage.png)
หากดำเนินการเสร็จสิ้นจะปรากฎภาพลายเซ็นดังรูปด้านล่าง
[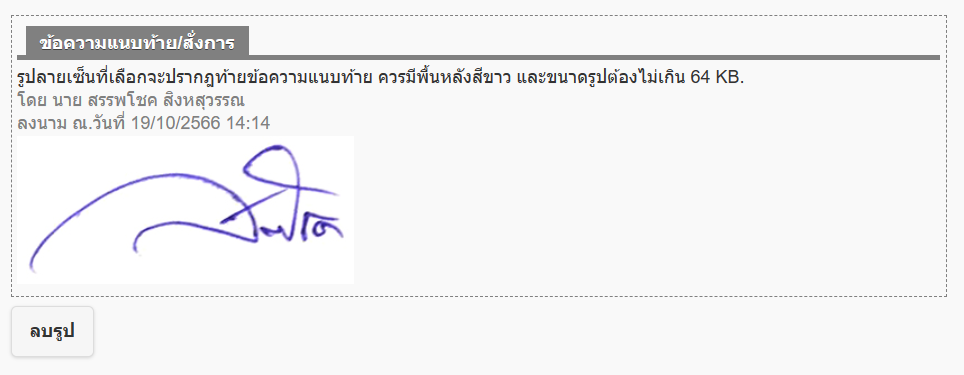](https://arit-manual.nstru.ac.th/uploads/images/gallery/2023-10/hMYimage.png)
### วิธีที่ 2 การวาดลายเซ็นชื่อผ่านระบบ
[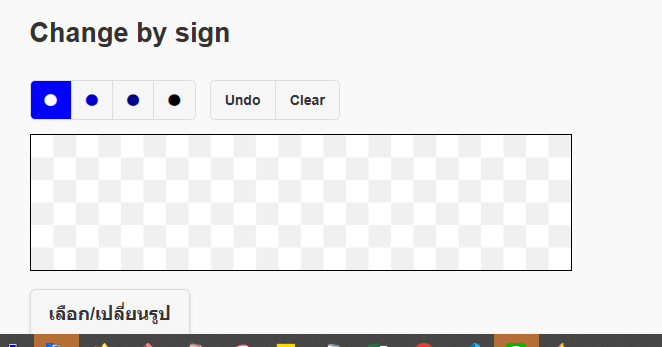](https://arit-manual.nstru.ac.th/uploads/images/gallery/2023-10/7ciimage.png)
เป็นวิธีวาดลายเซ็นชื่อใหม่ผ่านกล่องเซ็นชื่อของระบบ โดยผู้ใช้สามารถใช้อุปกรณ์ เช่น ปากกาดิจิทัล เขียนลงในกล่องที่ระบบกำหนดไว้ จากนั้นคลิกที่ปุ่ม เลือก/เปลี่ยนรูป เพื่อบันทึกลายเซ็นไว้ใช้งานต่อไป
[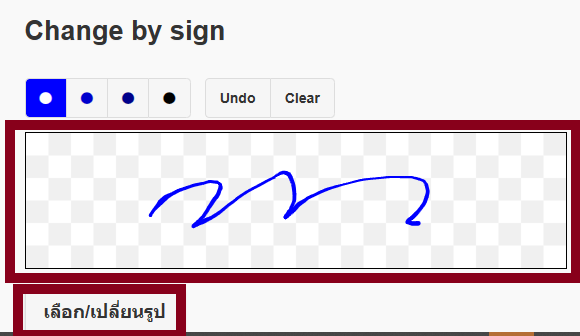](https://arit-manual.nstru.ac.th/uploads/images/gallery/2023-10/3ycimage.png)
# เงื่อนไขและข้อตกลงในการใช้งานลายมือชื่ออิเล็กทรอนิกส์
1. สำนักวิทยบริการและเทคโนโลยีสารสนเทศ จะส่งลายมือชื่ออิเล็กทรอนิกส์ไปทางอีเมลมหาวิทยาลัย @nstru.ac.th ของบุคลากรผู้ใช้งานเท่านั้น หากผู้ขอไม่มีอีเมลมหาวิทยาลัย หรือไม่สามารถเข้าใช้งานอีเมลมหาวิทยาลัยให้ติดต่อเพื่อขอสร้าง หรือแก้ไขปัญหาการใช้งานได้ที่สำนักวิทยบริการและเทคโนโลยีสารสนเทศ
2. ผู้ใช้งานมีหน้าที่ในการตรวจสอบข้อมูลดิจิทัลในลายมือชื่ออิเล็กทรอนิกส์ของตนก่อนนำไปใช้งาน และหากพบความผิดพลาดของข้อมูลให้ประสานเพื่อขอแก้ไขหรือขอลายมือชื่ออิเล็กทรอนิกส์ใหม่ในทันที
3\. ผู้ใช้งานต้องรักษา ลายมือชื่ออิเล็กทรอนิกส์ และรหัสผ่านของตนอย่างดี เพื่อป้องกันไม่ให้ผู้อื่นที่ไม่ใช่ตนเองเข้าถึงไฟล์ ลายมือชื่ออิเล็กทรอนิกส์ของตนได้
4\. เมื่อพบว่าการนำลายมือชื่ออิเล็กทรอนิกส์ ของตนไปใช้งานในเอกสารอิเล็กทรอนิกส์ใด ให้ผู้ใช้แจ้งมายังสำนักวิทยบริการและเทคโนโลยีสารสนเทศในทันที เพื่อขอระงับการใช้งานลายเซ็นดังกล่าว
5\. กรณีมีปัญหาการใช้งาน หรือขอคำปรึกษาการในใช้งานสามารถติดต่อสอบถามได้ที่สำนักวิทยบริการและเทคโนโลยีสารสนเทศ หรืออีเมล suppachok\_sin@nstru.ac.th
# การแก้ไขกรณีเปิดโปรแกรม e-Document บน Windows ไม่ได้
### Reset Windows Applicataion and re-download (Clear Temp)
เพื่อแก้ปัญหากรณีโปรแกรมสำหรับ Windows ทำงานไม่สมบูรณ์
For fix problem when "Windows Applcation" improperly work.
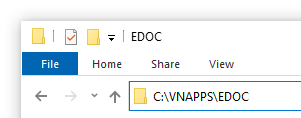
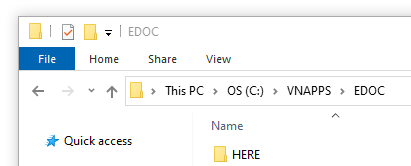
1. ไปยังโฟลเดอร์ที่ระบุในช่องข้างล่าง
Go to folder that address in below box.
หรือพิมม์หรือคัดลอกข้อความในช่องข้างล่างไปยังช่องที่อยู่ของ Windows Explorer หรือ This PC, จากนั้นกดปุ่ม Enter ที่แป้นพิมพ์
Or type or copy below text to address box of Windows Explorer or This PC, then press Enter button on keyboard.
2. Windows Explorer จะทำการเปิดโฟลเดอร์
Windows Explorer will open the folder.
3. ทำการลบไฟล์และโฟลเดอร์ทั้งหมด
Delete all files and folders.
4. ทำการเรียกใช้โปรแกรมอีกครั้ง
Open Windows Application.
หากดำเนินงานข้างต้นแล้วก็ยังไม่สามารถเปิดเข้าใช้งานโปรแกรมได้ให้ดำเนินการต่อดังต่อไปนี้
### Clear Microsoft ClickOnce Cache
เพื่อแก้ปัญหากดปุ่มเรียกโปรแกรมสำหรับ Windows แล้วไม่มีการตอบสนอง หรือเกิดข้อผิดพลาดของโปรแกรมก่อนเริ่มกระบวนการ Download
For fix problem that not response when click on open "Windows Applcation", or has error before download the application.
1. พิมม์หรือคัดลอกข้อความในช่องข้างล่างไปยังช่องที่อยู่ของ Windows Explorer หรือ This PC, จากนั้นกดปุ่ม Enter ที่แป้นพิมพ์
Type or copy below text to address box of Windows Explorer or This PC, then press Enter button on keyboard.
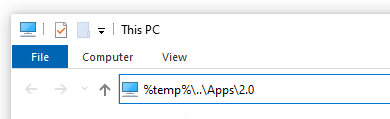
2. Windows Explorer จะทำการเปิดโฟลเดอร์
Windows Explorer will open the folder.
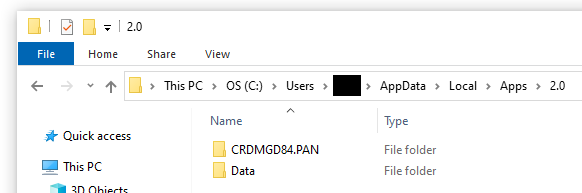
3. ทำการลบไฟล์และโฟลเดอร์ทั้งหมด
Delete all files and folders.
4. ทำการเรียกใช้โปรแกรมอีกครั้ง
Open Windows Application.
# การปรับปรุงเวอร์ชั่นของระบบ e-Document สำหรับระบบปฏิบัติการ Windows
[](https://arit-manual.nstru.ac.th/uploads/images/gallery/2024-11/image.png)
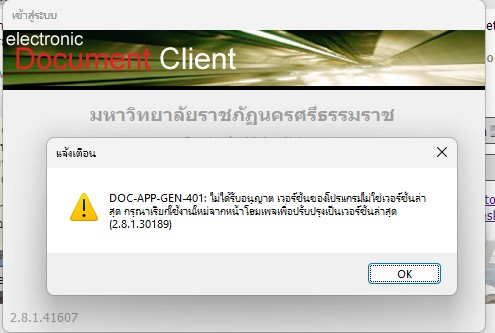
กรณีเกิดปัญหาการเข้าใช้งานโปรแกรม e-Document สำหรับระบบปฏิบัติการ Windows ท่านสามารถแก้ไขปัญหาเบื้องต้นได้ดังนี้
1\) เปิดบราวเซอร์ Microsoft Edge แล้วพิมพ์ URL ไปที่ [https://edoc.nstru.ac.th](https://edoc.nstru.ac.th)
2\) คลิกที่ปุ่ม Open Windows Application ดังรูป
[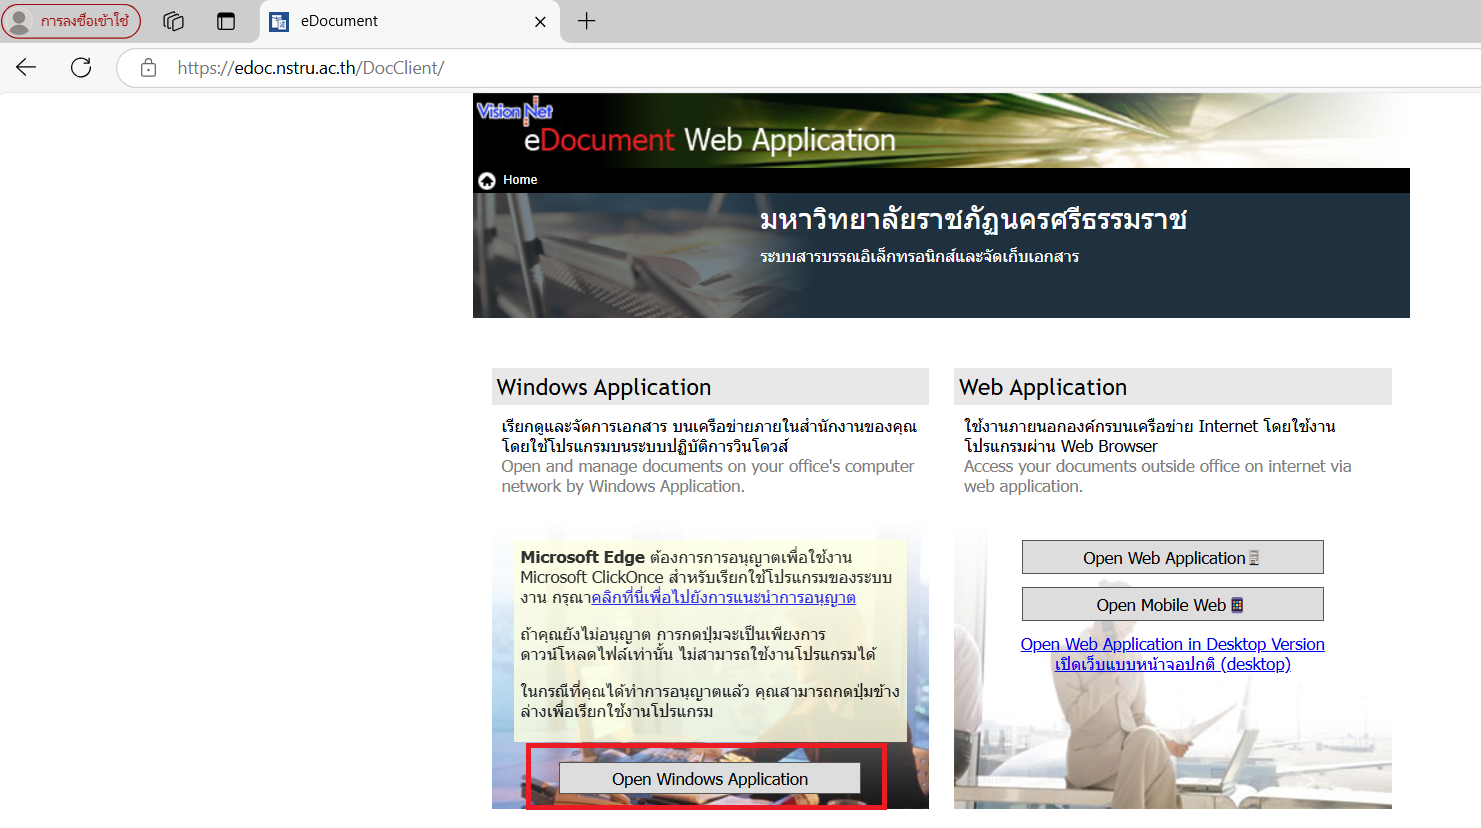](https://arit-manual.nstru.ac.th/uploads/images/gallery/2024-11/2jNimage.png)
3\) คลิกเปิดเรียกโปรแกรม e-Document ขึ้นมา
[](https://arit-manual.nstru.ac.th/uploads/images/gallery/2024-11/ZV0image.png)
4\) ให้คลิกทำเครื่องหมาย กาถูก หน้าข้อความ Reset / ตั้งต้นใหม่ เพื่อให้โปรแกรมเรียกข้อมูลโปรแกรมใหม่ทั้งหมด (ต้องรีบใช้เมาส์คลิกทำเครื่องหมายก่อนที่โปรแกรมจะดึงข้อมูลเดิมมาใช้งาน)
[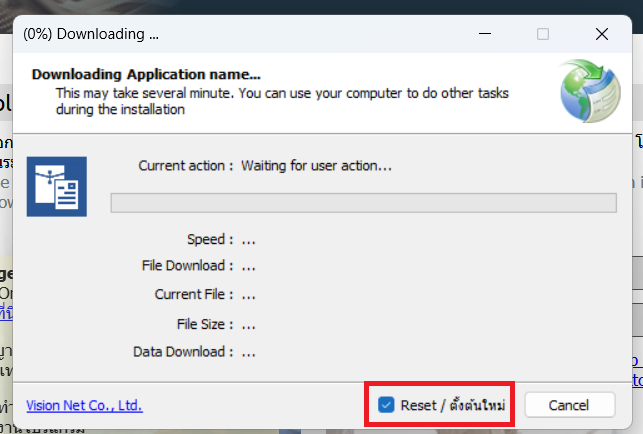](https://arit-manual.nstru.ac.th/uploads/images/gallery/2024-11/gPiimage.png)
โปรแกรมจะทำการเรียกข้อมูลโปรแกรมใหม่ทั้งหมดรวมถึงปรับปรุงเวอร์ชั่นของโปรแกรมในระบบปฏิบัติการ Windows ของเราด้วย
[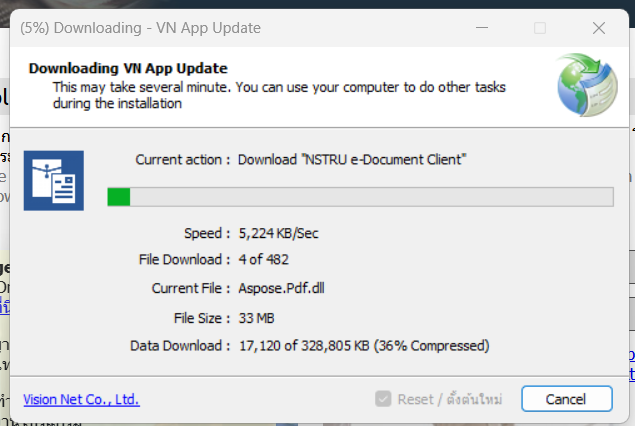](https://arit-manual.nstru.ac.th/uploads/images/gallery/2024-11/P0vimage.png)
ให้รอจนกว่าโปรแกรมจะเรียกไฟล์โปรแกรมครบ 100% เมื่อเสร็จสิ้นระบบจะเปิดหน้าต่างสำหรับยืนยันตัวตนเพื่อเข้าใช้งานต่อไป
[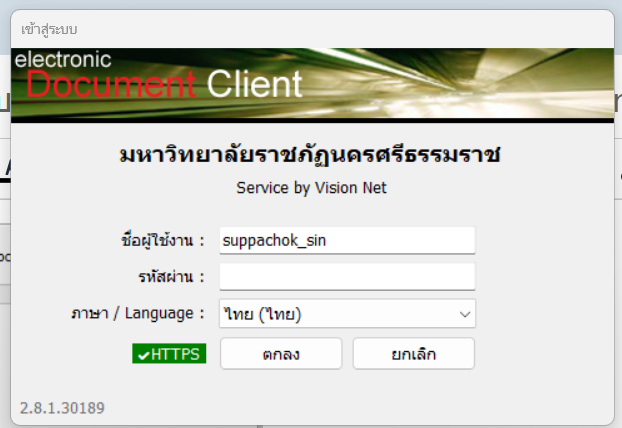](https://arit-manual.nstru.ac.th/uploads/images/gallery/2024-11/eeJimage.png)
# การขอบัญชีผู้ใช้งานระบบสารบรรณอิเล็กทรอนิกส์และบัญชีอีเมลมหาวิทยาลัย (สำหรับอาจารย์พิเศษ / ลูกจ้างโครงการมหาวิทยาลัย)
#### การขอบัญชีสำหรับใช้งานสารบรรณอิเล็กทรอนิกส์และบัญชีอีเมลมหาวิทยาลัย
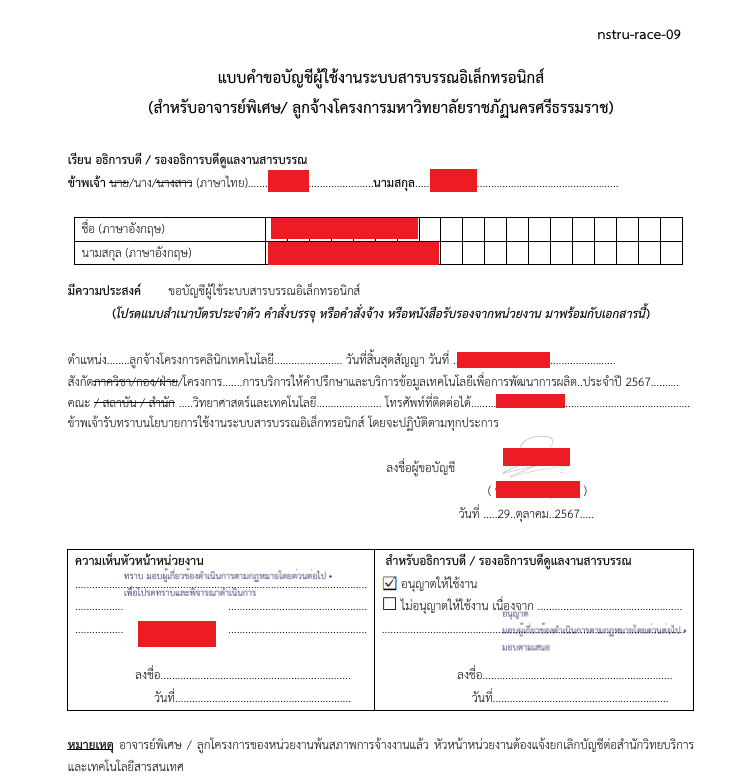
การขอบัญชีผู้ใช้งานระบบสารบรรณอิเล็กทรอนิกส์และบัญชีอีเมลมหาวิทยาลัย สำหรับอาจารย์พิเศษ หรือลูกจ้างโครงการมหาวิทยาลัย จำเป็นต้องได้รับการอนุญาตโดยอธิการบดี หรือรองอธิการบรดีซึ่งรับผิดชอบดูแลงานสารบรรณของมหาวิทยาลัยก่อนโดยสามารถดาวน์โหลดแบบฟอร์มขออนุญาตได้ที่ลิงค์ด้านล่างนี้
[https://drive.google.com/file/d/1vNBhpLsU\_lys6jsjppEJy4fyGfu2wByG/view](https://drive.google.com/file/d/1vNBhpLsU_lys6jsjppEJy4fyGfu2wByG/view)
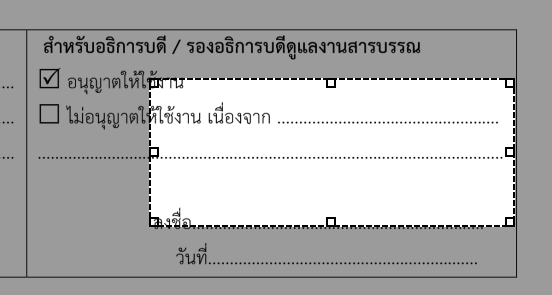
จากนั้นให้กรอกข้อมูลในแบบฟอร์มให้ครบถ้วน และแนบไฟล์แบบฟอร์มลงในระบบ e-Document เพื่อให้หัวหน้าหน่วยงานและรองอธิการบดีที่ดูแลงานสารบรรณปัจจุบันลงนาม ก่อนส่งคำขอมายังสำนักวิทยบริการและเทคโนโลยีสารสนเทศเพื่อดำเนินการสร้างบัญชีต่อไป
[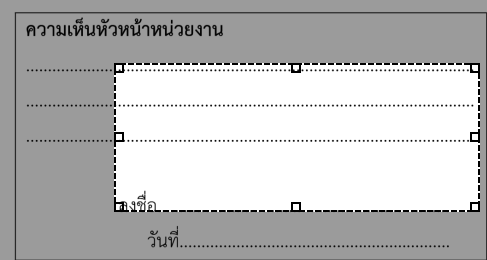](https://arit-manual.nstru.ac.th/uploads/images/gallery/2025-04/Hz8image.png)
[](https://arit-manual.nstru.ac.th/uploads/images/gallery/2025-04/image.png)
**ตัวอย่างแบบฟอร์มที่ลงนามโดยหัวหน้าหน่วยงานและรองอธิการบดีที่ดูแลงานสารบรรณปัจจุบันลงนามเรียบร้อยแล้ว**
[](https://arit-manual.nstru.ac.th/uploads/images/gallery/2025-05/image.png)